To unlock T13 troops, you must level up your mansion to level L1 (Legacy 1) and Family Training Center to Lv. 30. You must also have your troop camps leveled up to L1 (Legacy 1). After these requirements are met, you can unlock T13 troops in Family Business Agency – under the section Death Squad.
For example: To unlock T13 Shadow Hunter, you must Level up Family training Center to level 30, Biker Camp to Legacy 1 and unlock Shadow Hunter contract in Family Business Agency.
Increases attack and armor piercing, providing a significant advantage against bikers
Highly effective against T13 shooters
Tips
When opponent mainly uses bikers and shooters in their formation, add more brutal specters to your own.
Shadow Hunter
Can directly attack long-range units
Effectively lowers enemy hit rate, increasing your own survivability
Deals additional damage against T13 vehicles
Tips
Ideal as an initial striker to swiftly penetrate and weaken the enemy’s rear line
Expunger
Greatly lowers enemy defense and may deal massive damage instantly
When fighting bikers there is an additional chance of dealing extra damage, making it an effective counter for bikers
Can quickly clear enemy rows
Tips
They can make up part of your strategy to counter bikers. They can also provide excellent results when the enemy has many rows.
Bone Crusher
Excellent in defense, may potentially prevent enemies from attacking in the next turn. Pretty much an all-rounder.
Improves advantage against bulker formations.
Boosts defense and health, making them a solid shield for the team
Tips
They can be your first choice for assault or a solid defense against enemy attacks. Using a limited number of them can keep enemy crew formation attacking in the following turn, protecting your formation.
Devil Hunter
They have a certain chance of targeting two rear line crew types with an attack range greater than one during their charge.
Increases their dodge skills.
After charging, they deal additional damage to the enemy front line, ideal for swiftly weakening the enemy front line.
Tips
Efficiently targets the enemy’s rear line while maintaining survivability. They have a distinct edge over shooter formations.
Bloody Angel
Advantageous in defense, they can inflict pre-battle damage to the enemy.
Targets vital enemy units more accurately
Their attack can impact multiple rows, ideal for enemies with many rows.
Tips
They have the upper hand in defense battles and are adept at swiftly weakening or annihilating particular targets.
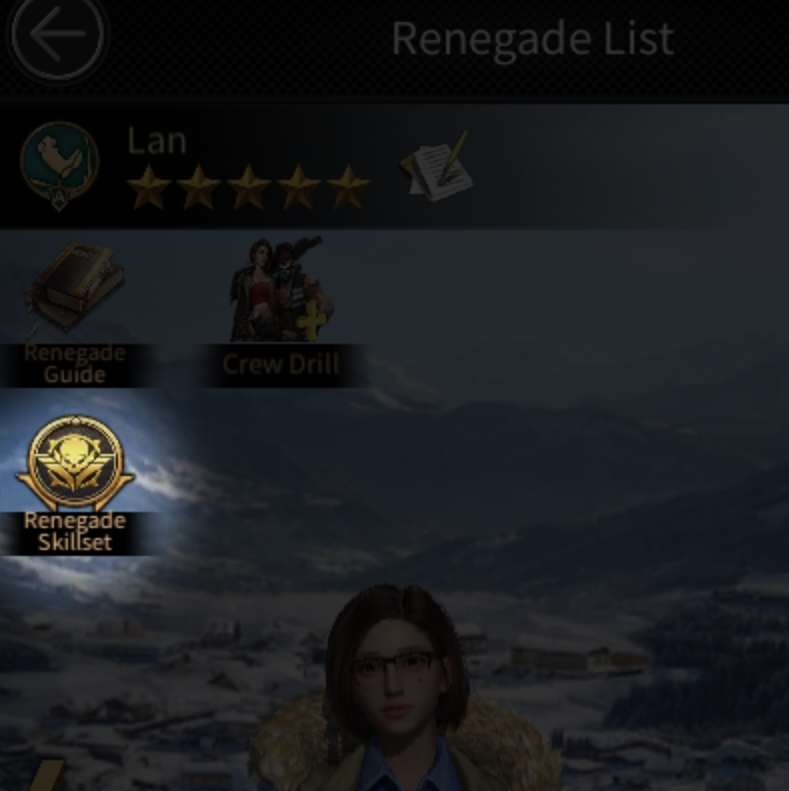
Renegades with unlocked Skillsets can significantly enhance their combat prowess by utilizing Skillset Codices. Promotions affecting Crew Members yield passive boosts directly impacting the attributes panel. Promotions specific to Renegades activate only when the renegade actively leads ops and are exclusive to that renegade.
Skillset Codices
You can acquire skillset codices by defeating season map mercenaries (max 200 codices per day), engaging in season activeness events, season achievement rewards, and season kill rewards.
You can sell renegade fragments to redeem silver and gold renegade coins which can be used to trade for various items (such as skillset codex.
How To Access It
You can access individual renegade’s skillsets via the renegade page and click on the Skillset Icon.
A quick recap on how to increase wounded capacity.
The most obvious way to do it is by leveling up hospital buildings. Each level increases capacity by 500.
You can also increase it in Mademan Store and Family Store (under the tab Level Privileges) in Family Resort.
Mademan Store Lv. 6
+20.000 capacity
Mademan Store Lv. 7
+20.000 capacity
Mademan Store Lv. 8
+20.000 capacity
Mademan Store Lv. 9
+20.000 capacity
…
…
Family Store Lv. 6
+1.000 capacity
Wounded capacity can also be increased with investments (in section: Criminal Enterprises)
Avg. Center Expansion Lv. 10
+20.000 capacity
Adv. Center Expansion Lv. 15
+30.000 capacity
Emblems can increase wounded capacity as well (Wounded Capacity emblems)
Grey emblem
+4.000 capacity
Green emblem
+8.000 capacity
Blue emblem
+16.000 capacity
Purple emblem
+24.000 capacity
Orange emblem
+36.000 capacity
Gold emblem
+50.000 capacity
Godfather’s Necklace Lv. 10 (Gold) increases wounded capacity for +40.000
This can be increased with equipment attribute buffs that you can get in Hitman Agency and with leveling up Pawnbroker.
With maxed Hitman Agency buff
+42.000 capacity
With max Pawnbroker level
+41.600 capacity
With both
+43.600 capacity
Capo Advisors can boost your wounded capacity for +50.000.
Babe Grace has a skill that increases wounded capacity too.
First two skills: 1.200 and 1.800 and then another upgradable skill.
Lv. 1
+5.000 capacity
Lv. 2
+7.000 capacity
Lv. 3
+10.000 capacity
Lv. 4
+14.000 capacity
Lv. 5
+20.000 capacity
Lv. 6
+35.000 capacity
Lv. 7
+50.000 capacity
Lv. 8
+65.000 capacity
Family babe Laura increases wounded capacity by +1.850 when maxing favor.
Family babe Svetlana increases wounded capacity by +3.500 when maxing favor.
Family babe Carmen increases wounded capacity by+3.500 when maxing favor.
Babe Scarlett increases wounded capacity by +5.000 when maxing favor.
Babe Catherine increases wounded capacity by +5.000 when maxing favor.
Babe Marie increases wounded capacity by +7.500 when maxing favor.
Vigilante Adriana increases wounded capacity for +30.000
Car armament can boost wounded capacity by 33.9% (with Gold Plate Armament)
Leader footwear equipment (Italian Brogues Lv. 40 – Gold) can increase wounded capacity by 28.22%.
Leader pants equipment (Ultra-formal Trousers Lv. 40 – Gold) can increase wounded capacity by 28.22%.
Leader tops equipment (Ultra-formal Tuxedo Lv. 40 – Gold) can increase wounded capacity by 28.22%.
Leader accessory equipment (Burma Ruby Ring Lv. 43 – Gold) can increase wounded capacity by 33.98%.
VIP 10 and above offers a 30% wounded capacity buff.
Leader talents – Support branch
Bigger Center I
+5.000 capacity
Bigger Center II
+20.000 capacity
Season mastery – support talents also allow you to increase wounded capacity.
Each Bigger Center can increase capacity up to +15.000
Having three Bigger Center talents maxed out gives you a +45.000 wounded capacity.
To sum it up. If you make an expertise set with everything mentioned above (with max available level) and 5 hospital buildings level Elite 5, you should have the following wounded capacity.
Hospital Elite 5 x 5 = 87.500
Babe Grace = 68.000
Family babes = 8.850
Babe Scarlett = 5.000
Babe Catherine = 5.000
Babe Emily = 5.000 (not a free babe – not counted in the final sum)
Vigilante Adriana = 30.000
Godfather’s necklace = 43.600
Investments = 50.000
Family Resort stores = 61.000
Leader talents = 25.000
7 gold wounded capacity emblems = 350.000
Maxed season mastery = 45.000
…………..
Total: 786.450
With Car armament boost and VIP10+ status (63.9%)
Total: 1.288.991
Now let’s compare different leader equipment and use the number above as the base number
Without leader equipment sets – leader equipment with 4 items that increase wounded capacity (118.64%)
Total: 1.529.260
Note: this is also max you can get without paying, options below require equipment sets that can only be bought with real money.
If you combine leader equipment with the Warlord set
Warlord Bowie Knife, Burma Ruby Ring, Ultra-formal Tuxedo, Warlord Tactical Pant, and Warlord Military Boot (total 166%)
Total: 2.139.726
If you combine leader equipment with the Warlord set and the Dominant set
Dominant’s Gun, Warlord Bowie Knife, Burma Ruby Ring, Ultra-formal Tuxedo, Warlord Tactical Pant, and Warlord Military Boot (total 199%)
Total: 2.565.093
If you combine leader equipment with the Supreme set, Warlord set, and the Dominant set
Each Capo Advisor’s experience is independent, and each Advisor has their own method of getting experience.
Leaders can view an Advisor’s benefits at each level on their detailed page. Advisors will unlock Promotion Tasks at a certain level, which raises their level cap after completion (final level cap shown on their interface).
Any excess experience beyond the Advisor’s current level cap will be cleared.
Capo Advisors come with great buffs for Resources which is a collective name for Cargo, Cash, Arms and Metals only (no gold).
Experience can be gained by doing their individual tasks or by using Exp Items (which can be bought – obviously 😣 )
You can access Capo Advisors at your Wall.
Advisors
Industrial Advisor
Unlock Requirement
Login for 1 day
Experience Task
Industry Welfare – gain 25 EXP for every 271 resources collected in-turf.
Buffs:
Resource Gathering Speed
Lv. 1: 2.1%
Lv. 70: +150%
Resource Production speed
Lv. 1: /
Lv. 31: +1.5%
Lv. 70: +60%
Vault Protection Capacity
Lv. 1: /
Lv. 61: +3.000
Lv. 70: +30.000
Engineering Advisor
Unlocking Requirement
Login for 2 days
Experience Task
Refurbish Welfare – gain 2.3 EXP for every 100 seconds of building time passed
Buffs
Instant Construction Time
Lv. 1: +1 min
Lv. 30: +30 mins
Construction Speed
Lv. 31: +1 %
Lv. 70: +40 %
Lv.1 – Lv.29 building cost (resources)
Lv. 1: /
Lv. 31: -0.3 %
Lv. 60: -10 %
Lv.30 – E5 building cost (resources)
Lv. 1: /
Lv. 61: -1%
Lv. 70: -10%
Building Upgrade Cost (Elite Blueprints)
Lv. 1:/
Lv. 60: -1
Lv. 70: -10
Battle Tactic Advisor
Unlocking Requirement
Login for 3 days
Experience Task
Enlistment Welfare – gain EXP for crew recruited via training
T1 x 100 = 20 EXP
T5 x 100 = 58 EXP
T10 x 100 = 173 EXP
T11 x 100 = 380 EXP
T12 x 100 = 790 EXP
Buffs
Crew Training Capacity
Lv. 1: +29
Lv. 80: +2.500
Crew Training Speed
Lv. 1: /
Lv. 31: +0.5%
Lv. 70: +30%
T1-T10 Training Cost (resources)
Lv. 1: /
Lv. 61: -1.5%
Lv. 70: -15%
T11-T12 Training Cost (resources)
Lv. 1: /
Lv. 71: -1%
Lv. 80: -10%
Medical Advisor
Unlocking Requirement
Login for 4 days
Experience Task
Medical Welfare – gains EXP for crew healed via healing center
Edge of Eighty-Six is the fourth theme of Mafia City’s Season Conquest event. The entire event is split into multiple sessions, and each session lasts 43 days, which consists of a pre-season expedition plan, an official season event, and a showcase stage.
The pre-season expedition plan lasts 7 days, the official season event lasts 35 days, and the showcase stage lasts 1 day. There will be a break between each session for leaders to participate in the migration.
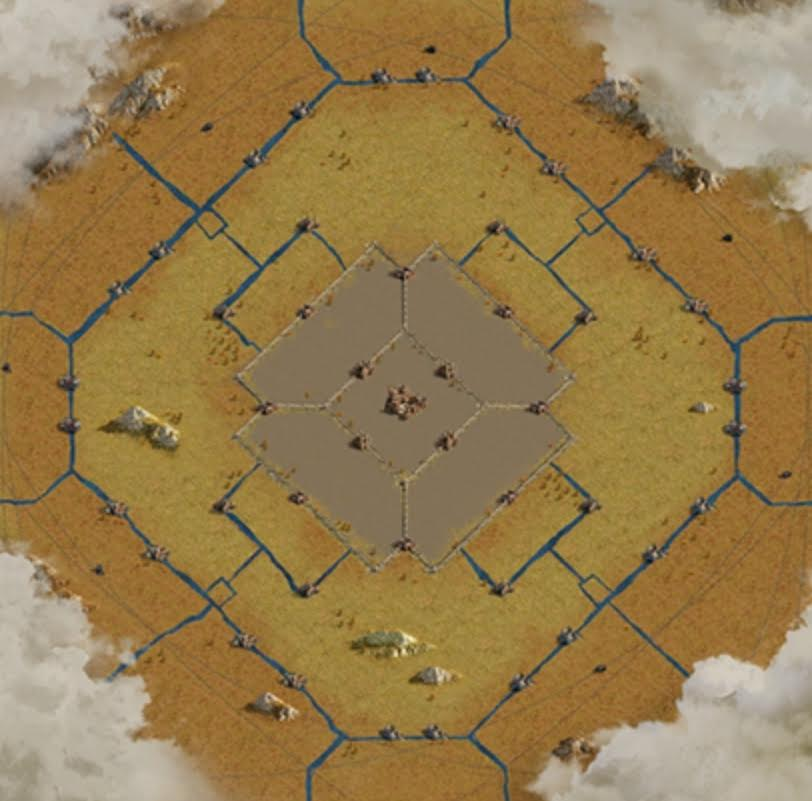
After entering the season map, leaders will be able to access a new map and start a new adventure.
Leaders of 12 cities will enter the event map and appear around an expedition base in 12 different towns of the Meerica Outskirt Regions. The aim is to reach and take control of the Meerica Central Block in the center of the map.
How to get points?
Defeat mercenaries (2000 per day)
Defeat Scarlatti Squadron (20 points acquisition chances per day)
Participate & Dispatch Trucks in cartel bootlegging
Kill crew in the season map
Participate in the war day contest
Kill crews in zones
Scarlatti’s war drill
Participate in Era of Prohibition, Bar Pinball and other special events
Battles fought at neutral buildings give extra kill points
Season Forces & Sites
Scarletti Forces: Lackeys of the Scarletti cartel family which roams Meerica City for bootlegged alcohols and their level range between 26 and 40. They share the same acquirable reward limitation and drop rewards as the street forces.
Scarletti Squadrons: Highly trained and dangerous henchmen of the Scarletti cartel family. Defeating them will earn you a great rewards.
Season Mercenaries: Helps hired by the Scarlettis to thward Leader’s plans. Although equipped with Alpine Equipment, they share the same defeat limits and drop rewards as normal mercenaries.
Meerica City Materials
This kind of materials refers to Moonshine and Municipal Debt as a whole.
Moonshine: An essential material for researching corresponding season contracts.
Municipal Debt: An essential material for constructing clan buildings and lookout towers on meerica city. It can be gathered by leaders, but will be directly stored in the clan municipal house.
Note: Leaders will receive a corresponding number of clan municipal points that can be used to redeem items in the clan municipal house based on their contributions.
Combat Casualty Ratio (Attacker & Defender)
Meerica Central Block: 100% lost
Empty Tiles: 100% lost
Lookout Towers: 40% lost / 60% wounded
Security Bases & Neutral Buildings: 40% lost / 60% wounded
Material Tiles: 40% lost / 60% wounded
Combat Casualty Ratio (Attacker/Defender)
Turf & Clan Buildings: 100% lost / 100% wounded
Season Aid Center
Lost crew members resulting from battles with other leaders in the Meerica city battlefield will be accommodated in the season aid center. These crew members can be revived using [Regular Meerica Aid Kits] and [Advanced Meerica Aid Kits] when the Aid Center opens after the war day event and season session ends.
Every time the aid center opens, only the lost crew from after the previous aid center is opened to before the current aid center opens will be accommodated.
Teleportation & Truce Rules
Leaders must have their turfs within their region to move around the event map. Also leaders will not be able to activate any truce if their turf is not within jurisdiction of a lookout tower.
In case whereby leaders have a truce activated, and the corresponding lookout tower is destroyed, the duration of the activated truce will be directly adjusted to last for 8 hours if they are above 8 hours, while those below 8 hours will remain unchanged.
By occupying buildings or researching contracts, leaders can get the raw materials (hops, malt, grape bricks) for crafting bootleg booze, which can be collected at council hall. They stop producing once the hit the storage cap and will continue after collection (raw material factory Lv. 1 cap: 1.000, Lv. 2 cap: 1.800, Lv. 3 cap: 3.000)
Processing Occupying buildings or researching contracts lets you process raw materials (10 hops + 10 malt = 1 beer; 10 grape bricks = 1 wine). There’s a wait time for processing and leaders cannot cancel the process during this period. Thereafter, it’s added to your bootleg booze inventory.
Processing Cap Daily bootleg booze crafting is capped, set by city building occupation and developed contracts. After starting a processing job, you can’t reverse it. The cap is deducted once processing is tapped and resets daily.
Bootleg Booze Sell the bootleg booze you’ve made at bootleg markets or speakeasies to get both personal and alliance funds.
The event spans 7 days. During this period, Search Zones will refresh around 12 expedition bases and between the Lv. 1 and Lv. 2 security bases. These zones last 3 hours each and will reopen 1 hour after its previous closing. Leaders can teleport when a zone is opened, but their truce will become invalid.
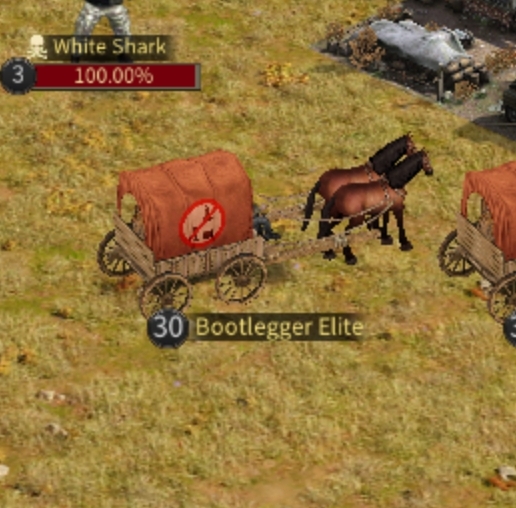
Leaders who successfully defeat street forces, mercenaries, or Bootleggers within the search zones, will collect confiscated goods with specific quantities as listed below:
Street Forces or Mercenaries: 1
Bootlegger Rookies: 3
Bootlegger Elites: 6
Obtainable daily limit: 80
Prohibition zones
Zones are marked in red like this
Confiscated Goods Rewards
By gathering confiscated goods you can get objective rewards (such as season points and conquest coins). You can track its progress in the bar above the map.
# of confiscated goods
Season Points
Conquest Coins
50
1.000
1.000
100
1.250
1.250
150
1.750
1.750
200
2.250
2.250
300
2.750
2.750
400
3.500
3.500
Bootlegger Rookie
Bootlegger Elite
Hint: To save the energy, you can do two things at once. Attack mercenaries in prohibited zones and you will get confiscated goods and a mercenary count.
Unlocking vehicles After unlocking the smuggling station, you can send ops to one to repair a truck. One ops can repair one vehicle. The higher the ops load, the faster the repair speed. Each 10k crew increases repair speed by 1 level. After completing a repair, the ops will return automatically, and the repaired vehicle can be used for transportation. Each vehicle may be sent out on 5 trips daily.
Special Crew After an Alliance constructs a prohibition camp, the berserk raider and TACT raider will be unlocked. When sending out a truck, you will need to appoint some of these special crew members to guard the transportation. For transportation, the combat strength of TACT raiders is more than that of the Berserk Raiders.
Bootleg Booze After unlock a station near your expedition base, get bootleg booze (bourbon, tequila, gin) by selecting a destination and sending a vehicle to transport or rob.
Smuggling Station The smuggling station is divided into 3 levels and unlocked through chronicle chapters. The amount and type of bootleg booze are random for each trip, and the higher the station level, the more valuable the bootleg booze obtained.
Vehicle Usage “Ferocious Tiger” can only be used to smuggle while “Sharp Blade” can be used to smuggle or rob.
Vehicle Capacity Each vehicle has its own capacity for bootleg booze and special crew. Ferocious Tiger must have at least 380 special crew to set off and can accommodate up to 920 of them. For the Sharp Blade, you need at least 420 special crew to begin a route, with a capacity of up to 1.000. Double Time must have at least 520 special crew to set off and can hold up to 1.250 special crew. All 3 vehicles will take 60 minutes to get to a Lv. 1 smuggling station (round trip), 70 minutes for Lv. 2 and 80 minutes for Lv. 3.
Plundering Each vehicle may bu plundered up to 3 times. Transport vehicles can only be robbed on the return trip. They will not be plundered again once the value of the transported bootleg boozes drops below 20%. Once the plundering vehicle’s destination station is selected, it will be matched with vehicles on a return trip from the same station to plunder. The amount of bootleg booze plundered is based on the difference in special crew carried by the vehicles.
Season points You will earn the base number of season points each time you complete a smuggling or plundering route. If the amount of bootleg booze you get from smuggling or blundering is high, additional points will be awarded based on the amount of bootleg booze. Lv. 1 smuggling station (Transportation points: 120 additional points: up to 60; Plundering points 50 additional points: up to 200). Lv. 2 smuggling station (Transportation points: 140 additional points: up to 70; Plundering points 60 additional points: up to 230). Lv. 3 smuggling station (Transportation points: 160 additional points: up to 80; Plundering points 70 additional points: up to 260).
Route Conditions At the top of the station, information on arriving and departing vehicles will be available. 3 vehicles or less: free, less than 10 vehicles: normal; less than 25 vehicles: busy; More than 25 vehicles: congested. The number of vehicles is the total between plundering and smuggling vehicles.
Special Troops
Berserk Raider and TACT raiders will not be retained after season ends.
Special Content
Fortune Liquor: Lures contrabandists to the turf in 5 minutes after using it. The contrabandists provide a random material equivalent to the highest level resource site as a fee.
Invigorating Liquor: Increases the ops capacity by 20% and ops speed by 100% when attacking other leaders for the first time. This skill can be stacked and lasts 24 hours.
Brain Cleanser: Doubles mercenary/scarlatti family ops damage, their energy cost, and drop reward for 2 hours (each attack is counted 2 times).
Fruit Liquor: Reduces personal contract material cost by 30%. This skill can be stacked and lasts 24 hours.
Warrior’s Drink: After activation, increases the overkill ratio of clan members (when attacking with a 9×9 area around your turb) by 5% for 1 hour.
Overflowing Cup: Refilling on Moonshine instantly resets all other active skill CDs to zero.
Banishment: After skill activation, make the picked clan member unable to attack others or be attacked for 1 hour (this skill will cause the disbanding of any raid they participate in and send back any crew garrisoned outside.)
Early Warning Radar: For 15-mins after skill activation, have the detection level of clan members’ radar max out while rendering enemies’ stealth operation invalid can effectively counter the off-radar assault skill.
Cunning Smuggler: For 30-mins after skill activation, boost the season material gained by clan members via gathering (after returning to turf) by 25%.
Emergency Recruitment: After skill activation, remove all negative skill effects on the picked clan member and make them invulnerable to those effects for 12 hours.
High-Speed SUV: For 30-mins after skill activation boost the gathering speed and ops speed of clan members by 50%.
Total Roadblock: For 2 hours after skill activation, drastically reduce the ops speed of the picked leader turf (the latter activated skill will override the first if this skill is activated with the “territorial motion” one.)
Charge Together: For 1 hour after skill activation, boost the damage stat of any clan member within a 9×9 radius of the picked clan member’s turf by 100%.
Engineering Master: For 30 minutes after skill activation, boost the construction speed of clan lookout towers by 100% (this speed my be affected if the skill user exits the lookout tower.)
No points are rewarded for killing Sailor and Tactical Privateers
War Day Contest
Island Daily Kill Settlement
Lighthouses event
Island Recon Operation
Jet Ski Racing
Battles fought at neutral buildings give extra kill points
Reward for acquiring 80.000 personal points.
Trading Ports
Upon unlocking the trading ports, leaders can send ops there for Ship Repairs. After that, Maritime Trade can be unlocked at the Council Hall.
Lookout Towers
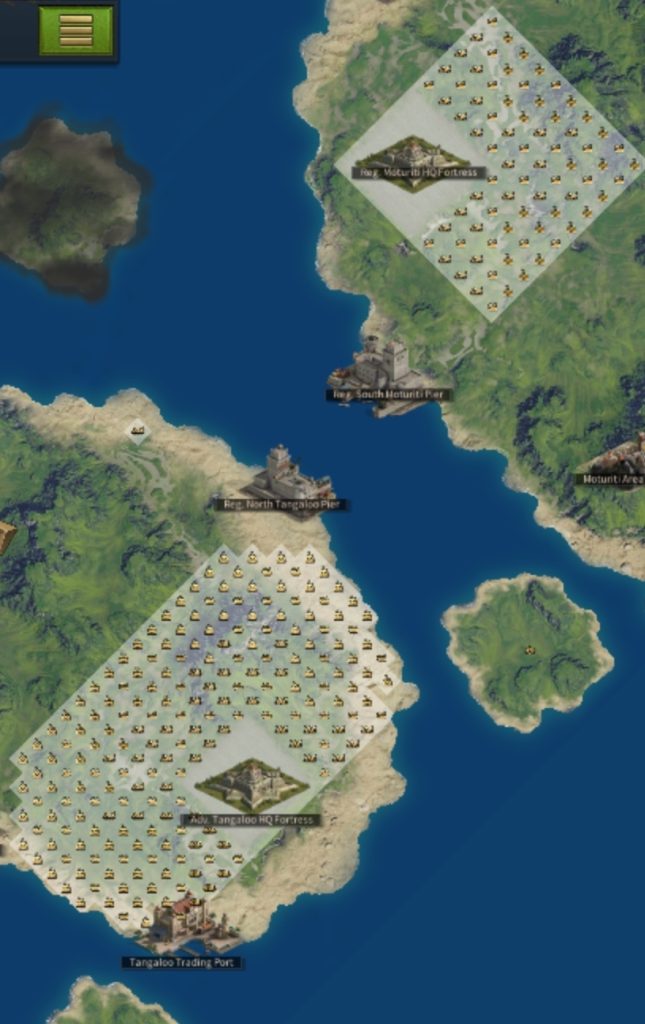
Build lookout towers to reach Security Base, Neutral Buildings and more. Once you occupy one neutral building, adjacent neutral buildings can also be occupied.
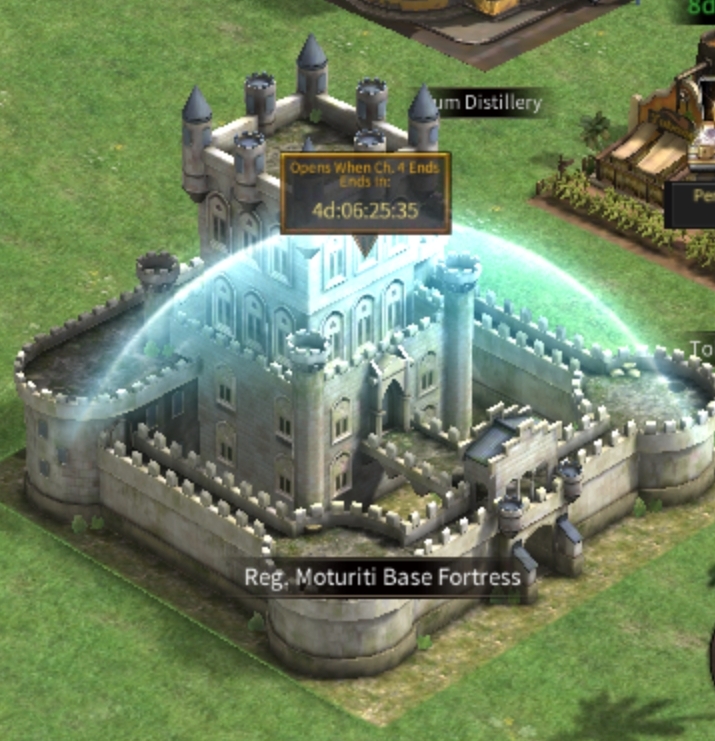
HQ Fortress
If your city occupies a neutral building that’s adjacent to the HQ Fortress, you can attack HQ Fortress, occupy it then proclaim the domain. Proclaiming a domain may take some time, but once it’s done, it will bring significant assets to your city.
Lv. 2 Security Base
Reach Security base through the lookout towers, after which the base will establish a connection with the next island’s base. When two security bases are in the same state, you can teleport your mansion to the island where the connected base resides.
In the storm islands, you can only send ops to the island where your mansion resides. You cannot send ops to other islands.
Goods
There are 4 types of goods. Textile, Artwork, Spice and Jewelry. To get these goods you have to attack in-season wandering pirates and in-season mercenaries. Goods can be gathered from first 20 NPCs.
Trading ports unlock after first chapter ends (a day after season map opens). Once it’s unlocked, you have to repair 3 ships by sending 3 ops to the port. It doesn’t matter how many troops you send (it’s recommended you send the fastest troop – a biker).
There are 3 different types of ships.
Merchant Ships
60 minutes to repair it
Turret Ships
90 minutes to repair it
Torpedo Ships
120 minutes to repair it
Once any of your ships is repaired you unlock weapons (limit: 300 weapons at a time).
Once all your ships are repaired, you can send them to other ports where you can trade various goods.
Each island offers different goods for different prices. The price of goods on each island will change every 6 hours, and any ships dispatched before the change will trade according to the price when they began their trip.
When you select what island you want to go to, you will be asked whether you want to ship or pillage. For shipping you can use the merchant or turret ship, and for pillage you can use turret or torpedo ship.
Shipping
For shipping you have to add goods and weapons to the ship. Add maximum number of weapons to minimize the loss of goods if plundered.
Island
Personal Points Gained
Small Island
120 base points *60 extra points
Average Island
140 base points *70 extra points
Advanced Island
160 base points *80 extra points
* extra points depend on how many coins you lose during the trip. If you don’t lose any, you get whole extra amount.
Pillaging
For pillaging you can only select number of weapons. It’s recommended to use maximum number of weapons if plundered.
Island
Personal Points Gained
Small Island
50 base points *200 extra points
Average Island
60 base points *230 extra points
Advanced Island
70 base points *260 extra points
* extra points depend on how many coins you plunder during the trip. The more coins you plunder, the more extra points you get.
Plundering
The ratio of pirate coins acquired is based on the difference in the number of weapons on each ship. Each ship can be plundered up to 3 times. Transportation ships can only be plundered on the return course of a trip. If a ship on its return course has less than 20% of its pirate coin capacity, it will not be plundered again.
If you send your ships to plunder, they will look for other ships for 60/70/80 minutes. At the end they will bring some coins, depending on number of ships they will find, and you will also lose the weapons in the process.
Trip Time
For all 3 ships, complete trips to a Small Trading Port will take 60 minutes, trips to Average Trading Port will take 70 minutes, and trips to an Advanced Trading Port will take 80 minutes.
Fighting while travelling
If your ships gets attacked while shipping goods, you will fight them and both sides will lose some weapons and pirate coins.
Producing Weapons
When the amount of weapons owned is less than maximum capacity, weapons will automatically be produced: 1 weapon / minute, until it reaches maximum capacity again (300 weapons).
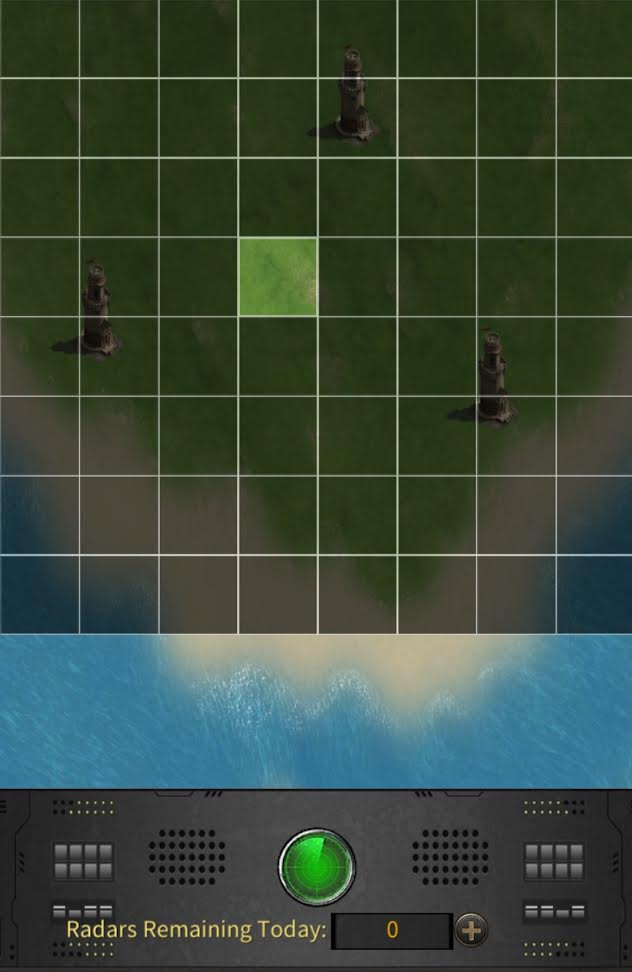
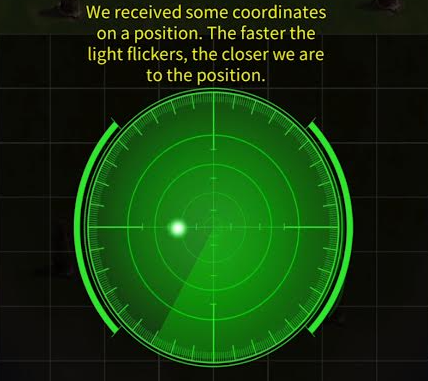
Drag a radar drop it on the squares and watch where the dot on the radar is. This tells you where the treasure is located relative to where you dropped the radar.
Repairing the lighthouses will bring powerful buffs and blessing to your city. Each lighthouse has its own effect.
Leaders need to send their Ops to repair lighthouses, and by repairing they will produce durability. Lighthouses are upgradeable if the city’s durability meets the required conditions. However, the lighthouses are old and will wear out over time. The wear will reduce the lighthouse’s durability, and if city leaders want to keep the lighthouse buffs, they will need to maintain and repair the lighthouses.
Providing durability to lighthouses give silver SC cards (Lighthouse tasks).
Lighthouse
Effect
Wear Rate
Harvest Lighthouse
Material Development
18.000 / hour
Rally Lighthouse
Crew Training
18.000 / hour
Combat Lighthouse
Battle Advantages
18.000 / hour
The lighthouses have 10 levels. First two levels offer no effects. Levels 3-7 offer active buffs, and levels 8-10 provide blessed skills to city leaders.
Level
Harvest
Rally
Combat
1
–
–
–
2
–
–
–
3
+4% gathering speed
+2% training speed
+2% crew attack
4
+8% gathering speed
+4% training speed
+4% crew attack
5
+12% gathering speed
+6% training speed
+6% crew attack
6
+16% gathering speed
+8% training speed
+8% crew attack
7
+20% gathering speed
+10% training speed
+10% crew attack
8
Harvest Blessing Level 1
Rally Blessing Level 1
Combat Blessing Level 1
9
Harvest Blessing Level 2
Rally Blessing Level 2
Combat Blessing Level 2
10
Harvest Blessing Level 3
Rally Blessing Level 3
Combat Blessing Level 3
Blessings
Harvest Lighthouse Blessing benefits
The harvest Lighthouse surrounding area becomes a high-level material belt. (The higher the benefit level, the higher the probability of high-level material tiles).
Rally Lighthouse Blessing benefits
Rally lighthouse can recruit sailor privateers
Combat Lighthouse Blessing benefits
Combat lighthouse skill allows you to increase revival during battles.
Maintenance Stones
Maintenance stones can increase the lighthouse’s durability by 10.000.
When leaders need to use maintenance stones, they can send their ops to selected lighthouses with maintenance stones, and the durability will increase.
Maintenance stones are only obtainable in [Storm Islands] City Contest.
During the season, there will be 4 rounds of events. Each round lasts 7 days, divided into the warmup phase (1 day), registration phase (2 days), registry result phase (1 day), scramble phase (1 day), and showcase phase (1 day).
Warm-up phase
Lasts one day. Leaders can prepare for the impending battle and learn about the amazing rewards available.
Registration phase
Lasts 2 days. The Mayor or City Officials can register to participate in the selected Storm Sites’ Scramble. The registration time and location can be modified throughout this Phase. Up to 4 Cities can register for each Storm Site. Early registration is recommended. Leaders can only select 1 Storm Site during the registration phase of each round. The system will automatically select a Storm Site for Cities that fail to register during the registration phase.
Registration result phase
Lasts 1 day. Leaders can view their City’s final registration location and time, as well as the location of the Storm Site against the corresponding City Protection Area.
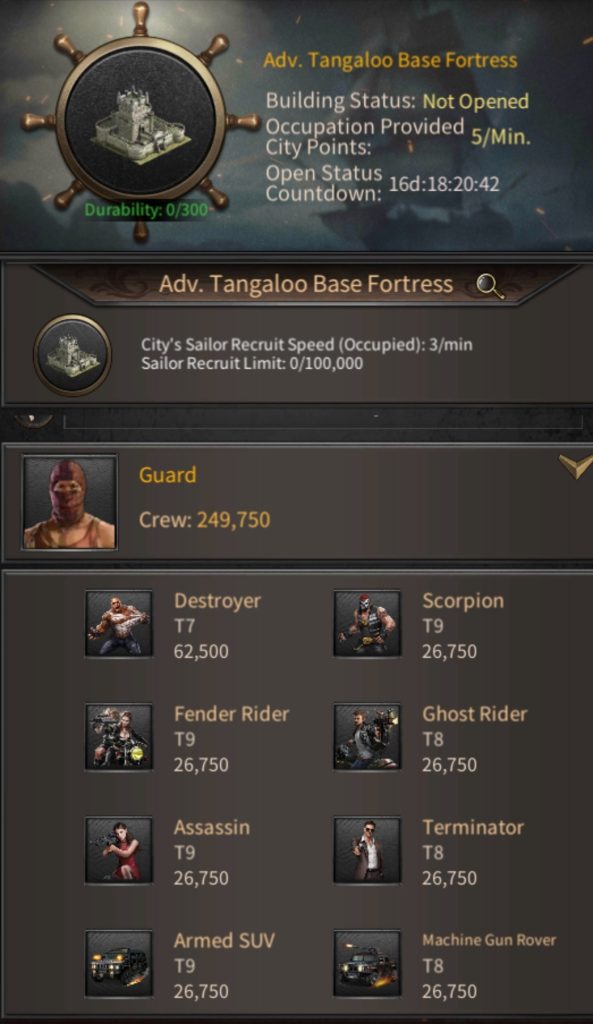
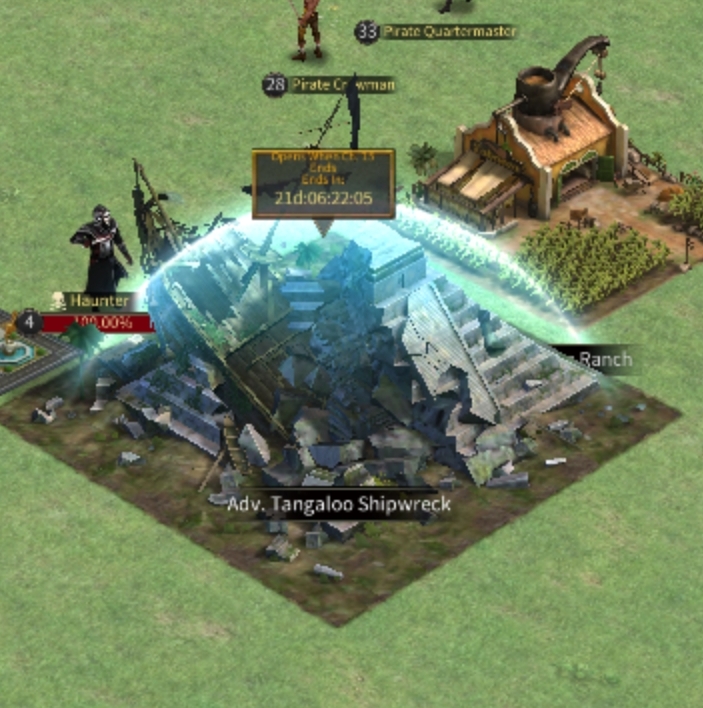
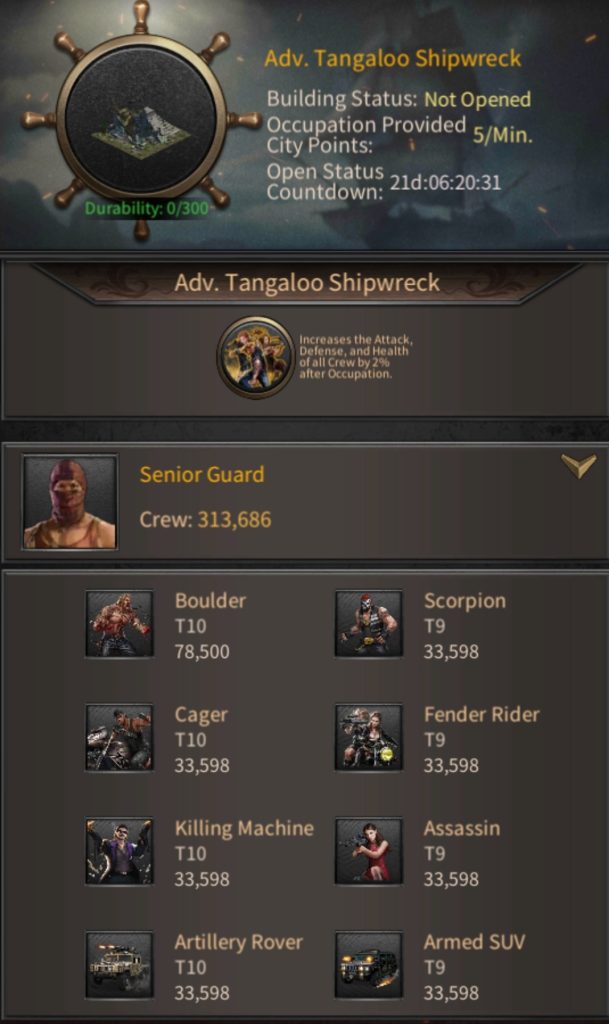
Scramble phase
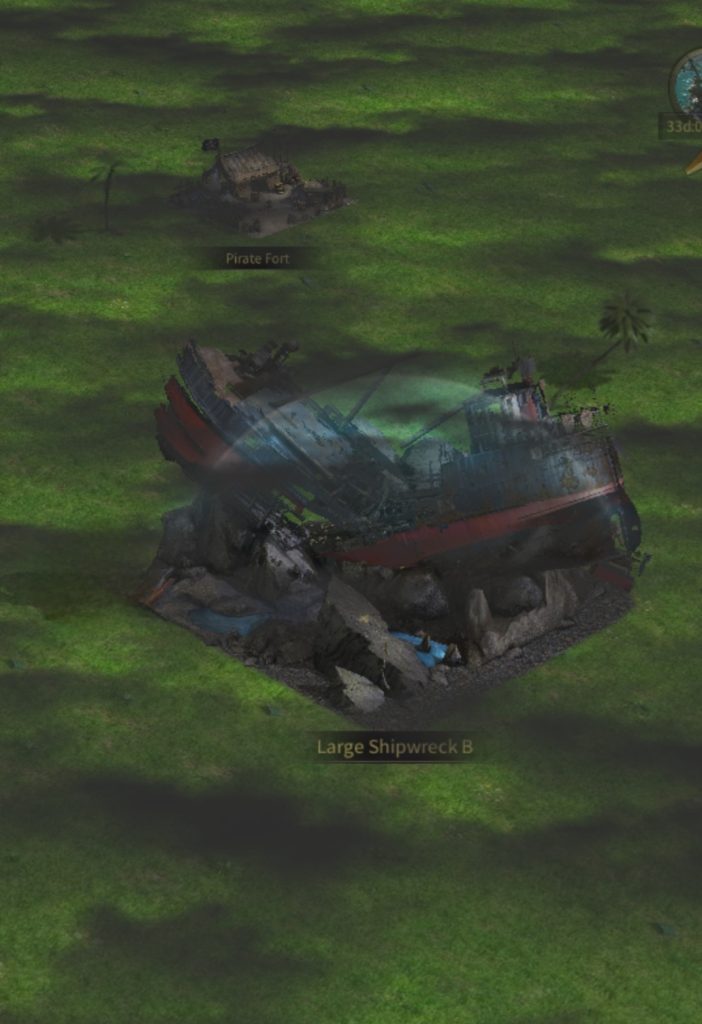
Lasts 1 day and starts concurrently with War Day. Each Storm Site will be open to Scramble for 5 hours. Cities will only be considered to have successfully Occupied a Shipwreck when they manage to Occupy it for 2 hours, and the Storm Site will also be closed for Scramble. When the City successfully occupies the Shipwreck, the City Leaders who participated in the Storm Site Scramble this round will receive a reward. The City will also receive the occupation points corresponding to the Storm Site, which will be used to settle the City’s Objective Points at the end of the 4 rounds. If no City Occupied it for 2 hours, then the City with the longest occupation time in that storm site will be considered to have successfully occupied it. If no one participated in occupying the shipwreck then it will be deemed to be a neutral occupation.
Showcase phase
Lasts 2 days. Leaders can see the final results of the Scramble and the City Points earned for Occupying the Storm Site
Event Tasks
Tasks can only be completed by going to the corresponding registered Storm Site when the scramble period begins.
The tasks will be reset each time the event starts a new round.
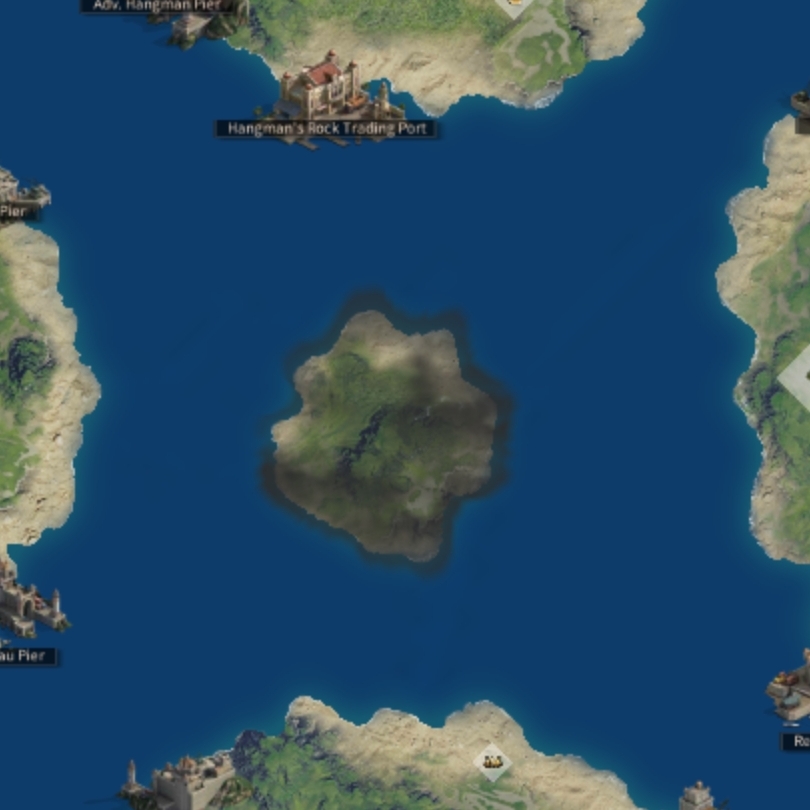
Storm Sites
During each Scramble Phase, Leaders can obtain I free Teleport chance to the Storm Site they registered for. At the Storm Site, Leaders can participate in the Scramble without building a Lookout Tower. Once the Scramble is complete, Leaders at the Storm Site will be sent to their respective City’s Expedition Base.
At the Storm Site, Leaders who kill enemies will obtain additional War Day Contest Points.
Leaders can only participate in the Scramble by entering the Storm Site. There will be no communication between those in and out of the Storm Site.
Storm Sites have 4 corresponding City Protection Areas, which will protect Turfs from the attacks of other City Leaders. Other Leaders will also be unable to Teleport their Turf to a City Protection Area that does not correspond to them. Outside of Protection Areas, Leaders will be unable to use a Truce.
Different Storm Sites have different rewards, and successfully occupying them will also give different amounts of city points. The strength of storm site defenders will increase along with storm site occupation points.
Pirate Coves
The pirate cove will be in a new location with every scramble phase.
When the shipwreck has enemy forces, the pirate cove will send out pirate ops at set intervals to attack the wreckage.
The The pirate cove can be attacked. The city that successfully attacks the pirate cove will occupy it. It will periodically help the city attack enemy factions in the shipwreck.
After the pirate cove is occupied by a city, if there are no garrisoned crew members for 15 minutes, the cove will rebel and recover its neutral status and defending forces.
Event Rewards
Task reward: Obtain rewards after completing certain tasks during the scramble phase.
Occupation reward: when your city successfully occupies a storm site shipwreck building, leaders who participated in the round’s scramble will receive an occupation reward.
City points reward: City points will be calculated after 4 rounds of the event. During the 4 rounds, cities will receive points for occupying storm sites. Rewards will be sent based on the total score after the 4 rounds are completed.
After activation, increases crew damage by 50%, and prevents next solo attack from appearing on the target’s radar, with ops trail only visible to you.
Dying Revenge
After activation, enter a Death Keeper state, where for 30 minutes, the souls of all your lost crew will be collected to form a team at the end of this state. This team can be used to initiate one solo attack on an enemy turf.
Hostile Treasury
After activation, locate a nearby rival mercenary (reaches your turf in 5 minutes) that will give random season materials equivalent to the highest-leveled resource tile if fended off.
Long Shot
After activation, get a +100% gathering, crew training or healing speed buff lasting 1 hour, or a -20% cost buff on your next researched island contract (these buffs only take effect in seven seas.)
Two-Edged Returns
Doubles mercenary/wandering pirate ops damage, their energy cost, and drop reward for 2 hours (each attack is counted 2 times).
Territorial Motion
After activation, the max travel time of all ops within the range of lookout towers will be 5 minutes for 30 minutes (if activated with “total roadblock” skill, the latter activated one will override the first.)
Overkill Spree
After activation, increases overkill ratio of your clan member, when attacking with a 9×9 area around your turf by 5% for 1 hour.
Early Warning Radar
For 15 minutes after skill activation, have the detection level of clan members’ radar max out while rendering enemies’ stealth operation invalid and can effectively counter off the off-radar assault skill.
Banishment
After skill activation, make the picked clan member unable to attack others or be attacked for 1 hour (this skill will cause the disbanding of any raid they participate in and send back any crew garrisoned outside.)
Siege Team
For 5 minutes after skill activation, the clan members’ attack on defenders of lookout towers and neutral buildings will ignore 25% of their defense and lower their own crew’s defense by 25%
Cunning Smuggler
For 30 minutes after skill activation, boost the season material gained by clan members via gathering (after returning to turf) by 25%.
High-Speed SUV
For 30-mins after skill activation boost the gathering speed and ops speed of clan members by 50%.
Engineering Master
For 30 minutes after skill activation, boost the construction speed of clan lookout towers by 100% (this speed my be affected if the skill user exits the lookout tower.)
Artillery Suppression
After skill activation, deal damage to 10% of the crew garrisoned in the picked enemy lookout tower (its region must be connected to your faction) after a 5-min countdown.
Total Roadblock
For 2 hours after skill activation, drastically reduce the ops speed of the picked leader turf (the latter activated skill will override the first if this skill is activated with the “territorial motion” one.)
Mega Bomb
For 30 minutes after skill activation, the clan members’ next single attack victory on an enemy turf will force its current location and restricted from returning there or its surrounding 9×9 area for 24 hours.
Charge Together
For 1 hour after skill activation, boost the damage stat of any clan member within a 9×9 radius of the picked clan member’s turf by 100%.
Emergency Recruitment
After skill activation, remove all negative skill effects on the picked clan member and make them invulnerable to those effects for 12 hours.
Assault Medic Aid
For 1 hour after skill activation boost the overkill ratio of any clan member within 9×9 radius of the picked clan member’s turf by 5%.
Weather Conditions
For more info about seven seas weather conditions, click here.
Start saving Hitman coins so you can unlock 3rd and 4th emblem slots for leader equipment and Godfather collection items. It costs around 200k hitman coins to unlock 3rd and 4th emblem slots for Godfather collection items alone (if not more).
You can earn hitman coins by defeating mercenaries, with Hitman Hotels, Hitman Resort, and by doing daily projects (Hitman Market task).
Short description of what Hitman Agency offers you
Category
Effect
Combat Services
Mostly improves defense, but also improves health, attack, speed, damage, and load
Development Services
Optimizes(*) hitman contracts, investments, construction, and vigilante training room improvements
Construction Services
Optimizes construction for buildings Lv 23-29
Training Services
Increases training capacity and optimizes training of Bulkers, Bikers, and Shooters.
Adv. Combat Services
Improves troops’ defense, health, attack, and speed. It also increases crime ops capacity, improves the stats of vehicle armament parts and increases family medical center capacity.
* The first 200 street forces give normal rewards, and the second 200 give smaller rewards.
* Quick summary if you complete 200 street forces, 200 mercenaries, and 10 gunmen. Total family reputation gained: 422.180 Total family points gained: 108.600
These numbers are most definitely above your cap. So if you want to optimize energy/family reputation & points, try something like this.
* Complete 80 street forces, 200 mercenaries, and 10 gunmen.
Total family reputation gained: 253.580 Total family points gained: 61.140
* considering you do street forces Lv. 32-35 and mercenaries Lv. 1-4 and Extreme Gunmen.
Rewards Comparison
Rewards
Street Forces
Mercenaries
Vicious Gunmen
Family Reputation
1938 Lv. 40
900 Lv. 4
4118 Extreme
Family Points
507 Lv. 40
240 Lv. 4
470 Extreme
Tactical Store Points
❌
✅
❌
Blueprint Frags
❌
✅
❌
Substance Z
❌
✅
✅
Elite Blueprints
❌
✅
❌
Normal Roadster Points
✅
❌
✅
Dirty Money
✅
❌
❌
1.000 VIP points item
✅
❌
❌
Hitman Coins
❌
✅
❌
Special Stones
❌
✅
❌
Lower Level Street Forces
Individual Mercenaries
Drop Probability
1-hr VIP
Lv. 1-3
Wine
Lv. 10-12
Bonds
Lv. 13-15
25% crime ops acceleration
Lv. 19-23
100k Leader Exp
Reaper
5% avg. 1pcs/drop
Elite Blueprints
Varian G.I.
16% avg. 1pcs/drop
Substance Z
Haunter
100% avg. 5.5pcs/drop
Elite Blueprints
Haunter
16% avg. 1pcs/drop
Hitman Coin
Haunter
100% avg. 2.5pcs/drop
Rare Armament Raffle
Haunter
5% avg. 1pcs/drop
Legacy Coin
Culprit
100% avg. 12pcs/drop
Elite Blueprints
Culprit
7% avg. 1pcs/drop
Silver Ingot
White Shark
Topaz
The Shredder
Morganite
Ghost
Black Jade
Venom
Birdy MH-1 Fragment
Skeleton
1% avg. 1pcs/drop
Purple Helicopter Gear Box
Skeleton
1-2% avg. 1pcs/drop
Gold Helicopter Fragment
Skeleton Lv. 4
0.05% avg. 1pcs/drop
Helicopter Ingenuity Chip
Skeleton
100%
Helicopter General Supplies
Skeleton Lv. 3 – Lv. 4
40% avg. 1pcs/drop
Are you wondering what NPCs to attack?
Need Substance-Z?
If you are non-payer and you’re low on substance-z, then go with gunmen instead of street forces.
Need Family Reputation/Points?
If you want to gain family reputation and points as fast as possible, go with street forces instead of gunmen. Street forces have the best family reputation&points per energy ratio.
You can get family reputation and points faster if you use Blue Devil car. It requires double the energy, but also doubles the reward.
When to attack mercenaries?
Always. Try to get as many mercenary kills per day as you can. They will provide you with a lot of resources, tactical store points and more.
Thursdays and Fridays are “mercenary days” – Battle Carnival. More mercenaries on the map and double the rewards, so try no to miss those
We use cookies to ensure that we give you the best experience on our website. If you continue to use this site we will assume that you are happy with it.