A feature for upgrading the roadster’s performance. Each tuning conducted will use roadster toolboxes to randomly modify the performance ratings of your roadster’s parts (engine, tires, brakes and suspensions).
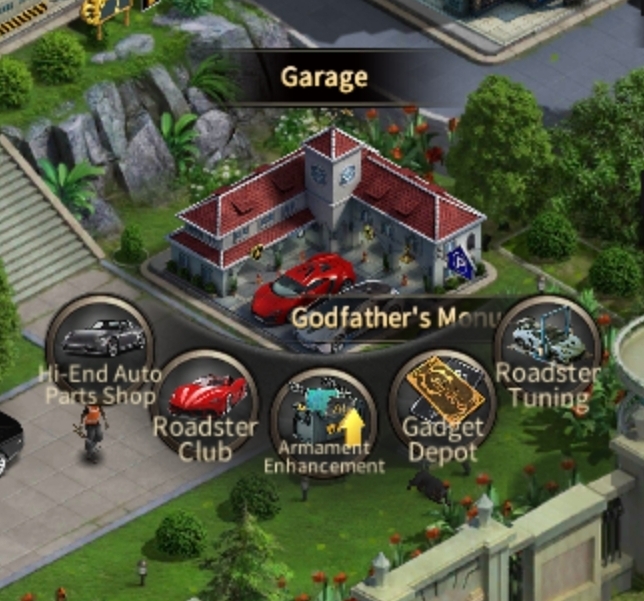
You can access Roadster Tuning in Garage.
How does it work?
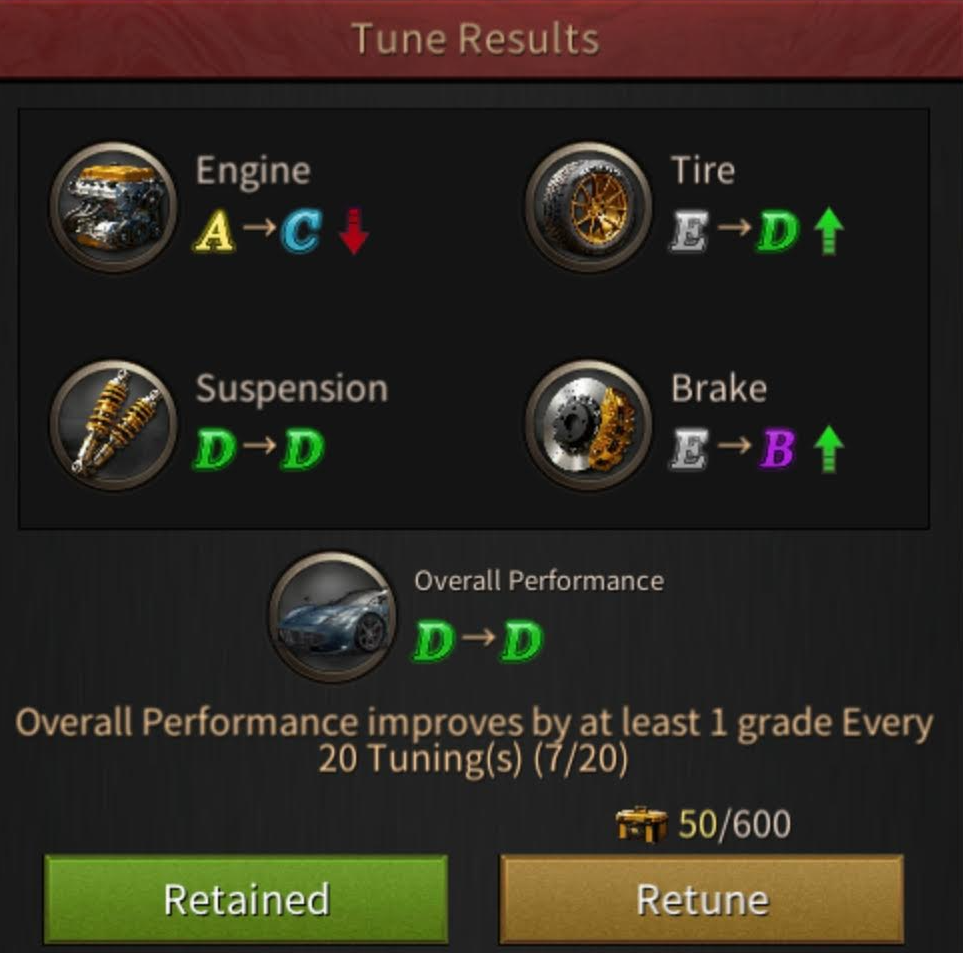
Tuning never lowers the overall performance rating, and every 20 tunings guarantees an increase to the overall rating by 1 grade.
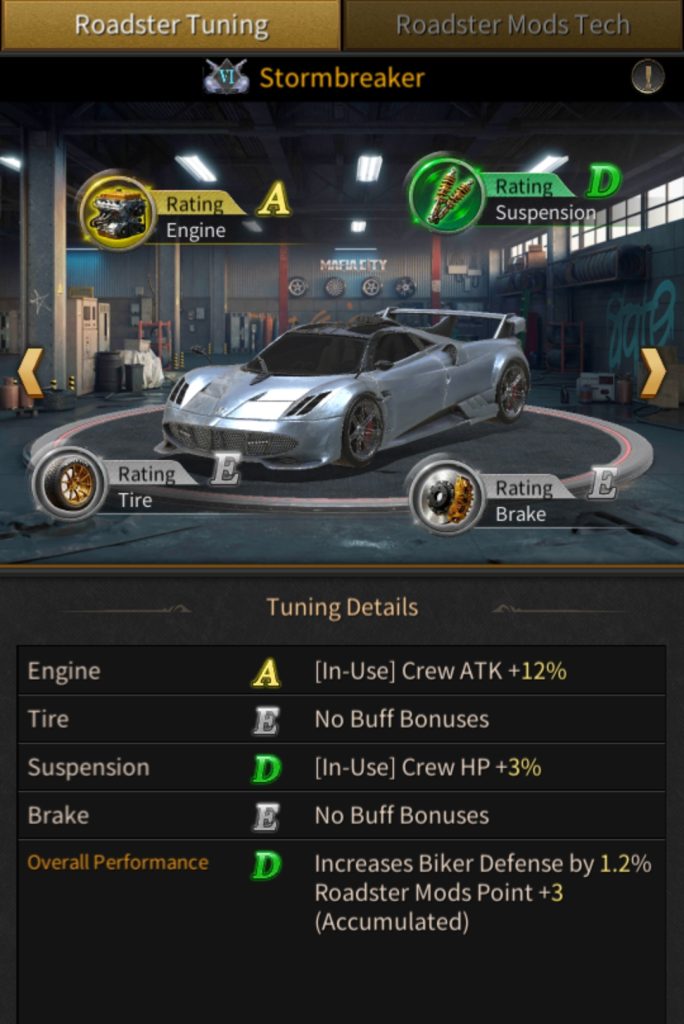
The higher the individual performance ratings of the four roadster parts, the greater the crew bonuses obtainable when the roadster is activated. Likewise, the higher the overall performance rating is, the greater the passive crew bonuses will be.
Each time you tune a car you get random attributes (which can be an improvement or a grade reduction – but overall grade will not be lower than the one you have at the moment).
Example Before -> After tuning:
Roadster Mods
Additional roadster mods points can also be gained based on the roadster’s overall performance rating.
The cost of roadster toolboxes needed per tuning, the crew bonuses provided from tuning, and the corresponding overall performance ratings awarded roadster mods points will be greater if the roadster is of a higher grade.
Roadster mods tech
A feature unlocking the roadster’s mods. The roadster mods points earned from tuning can be used to unlock roadster mods techs, granting powerful crew bonuses.
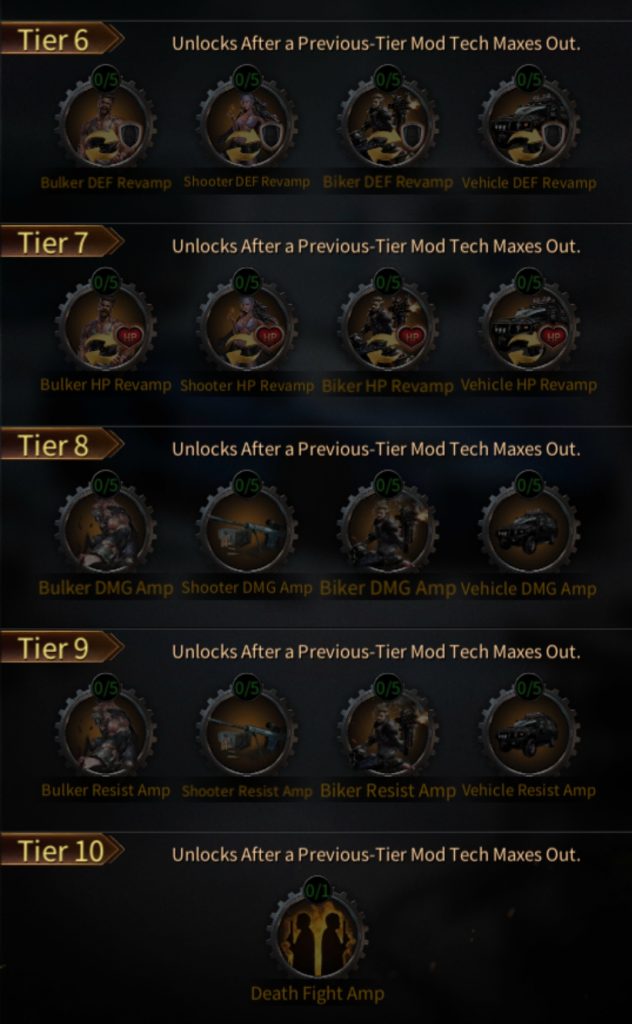
Mods tech is divided into tiers, with only 1 mod unlockable per tier. Only by completely unlocking a mod of the current tier can those of the next tier be accessed. The higher tiers of the mod tech, the more roadster mods points will be needed to unlock it.
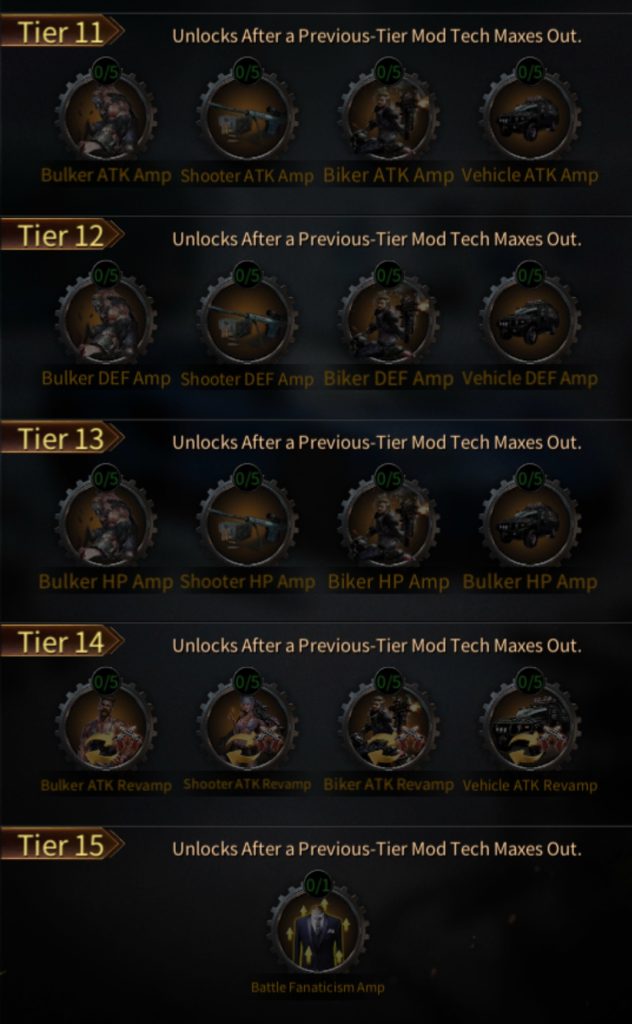
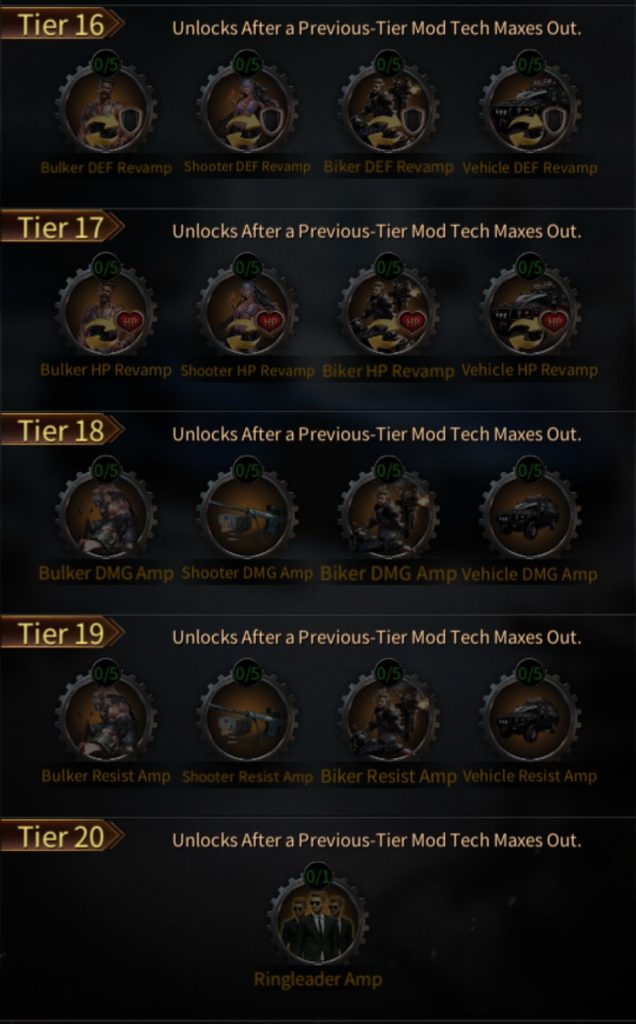
Roadster Mods Tech
Roadster mods tech are passive buffs (while roadster tuning is not). Buffs are divided into 20 tiers. Each tier can be accessible after you maxed out the mod from previous tier (only 1 mod per tier). Every 5th tier unlocks skill buff (Rescue skill cooldown reduction, Death fight skill cooldown reduction, Battle Fanaticism buff – leader equipment’s attributes buff, Ringleader buff – max crime ops capacity buff).
Revamp mod takes X% of other skills and converts it into a chosen one. For example 20% biker attack revamp
You can access blood covenant in your Family Club inside your mansion.
Each blood covenant is formed by 2 or more vigilantes, and will take effect once you’ve owned all of its members (vigilantes). The star level of a blood covenant’s benefits is in accordance to the star level of its lowest-starred member, vigilante, which you currently own.
The covenant will grant additional benefit attributes at its 3-star and 5-star levels. Each star up will further enhance the unlocked benefits.
All blood covenant benefits take effect immediately upon unlocking.
Alpha Commandos are buffed that affect the battles in combination with the renegades.
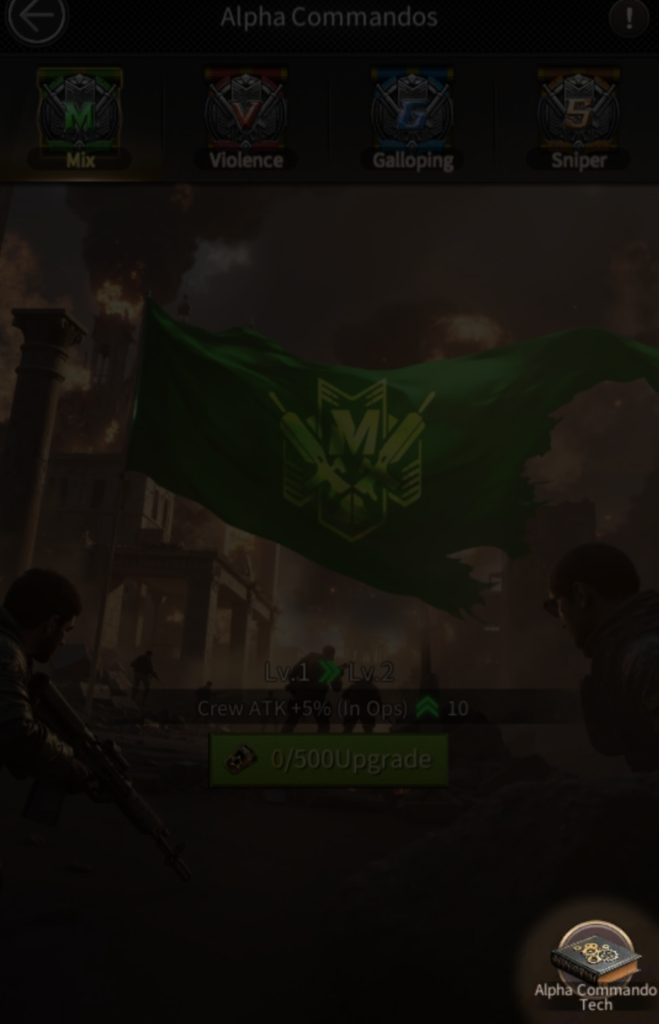
The Alpha Commandos are divided into different strategic teams, which must be unlocked via alpha commando tech. The Teams can be used once they’re unlocked. During deployment, the teams provide various buffs, and leaders can use these buffs to alter battle situations. Together with Alpha Commandos you can also equip Strategic Devices and Demolition Charge.
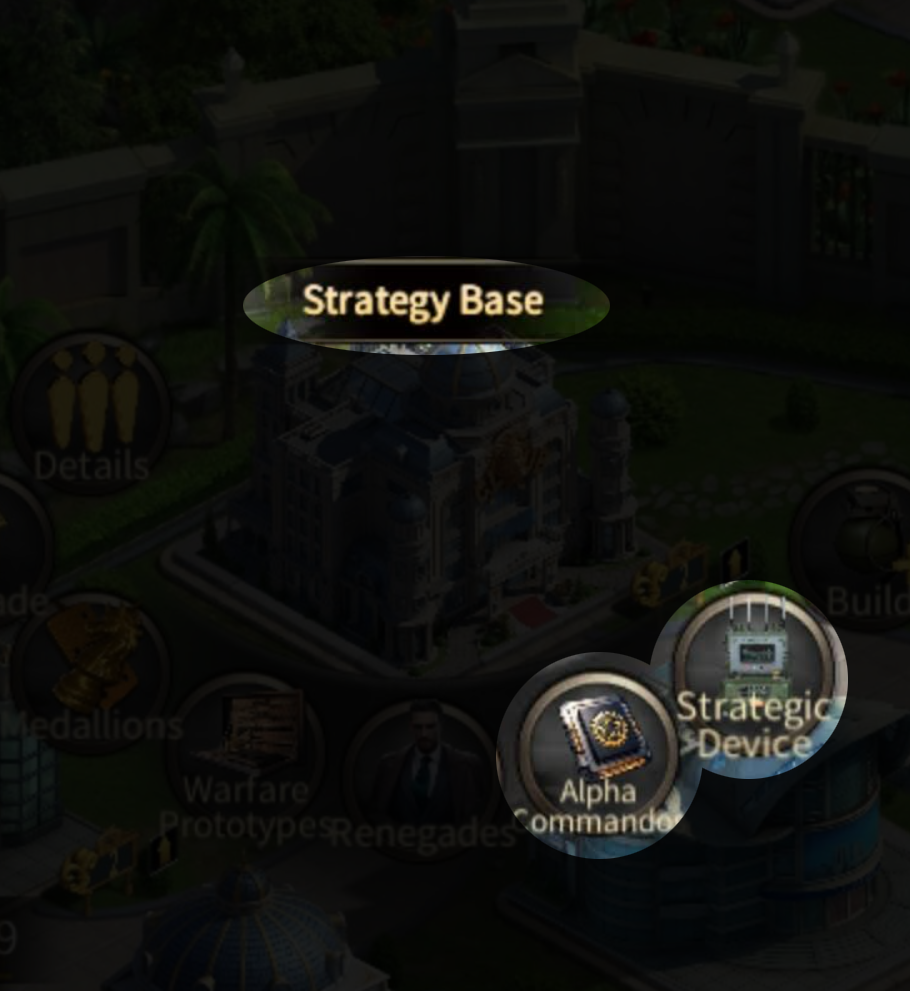
They can be upgraded and unlocked in the Strategy Base.
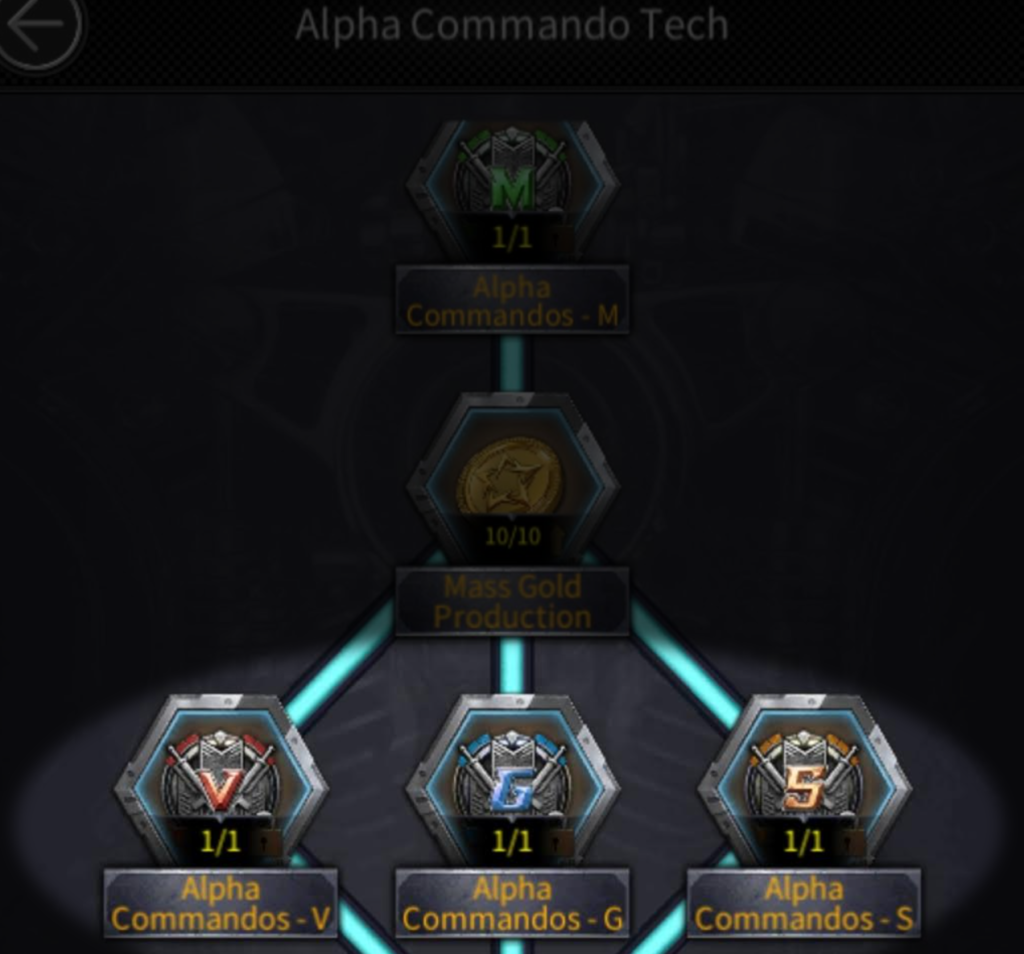
To develop and unlock it, click on the Alpha Commando Tech (in the corner at the bottom)
To unlock Commando skills, develop these three skills.
The Alpha Commandos are led by renegades, and the buffs are only effective if the renegade is in the ops and equipped with the alpha commandos.
Each ops can only carry one set of alpha commandos, and when multiple ops are deployed simultaneously, the alpha commandos carried by each team must be different.
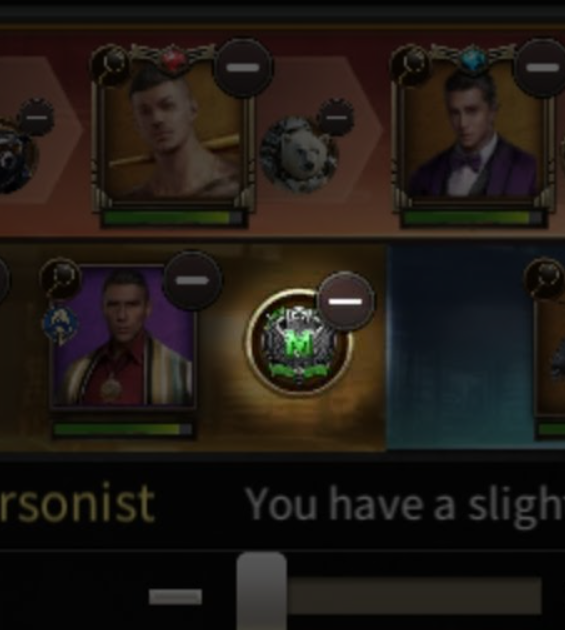
You can select what alpha commandos you want to use in a battle by clicking on the small circle near the renegades (but you have to have them unlocked first).
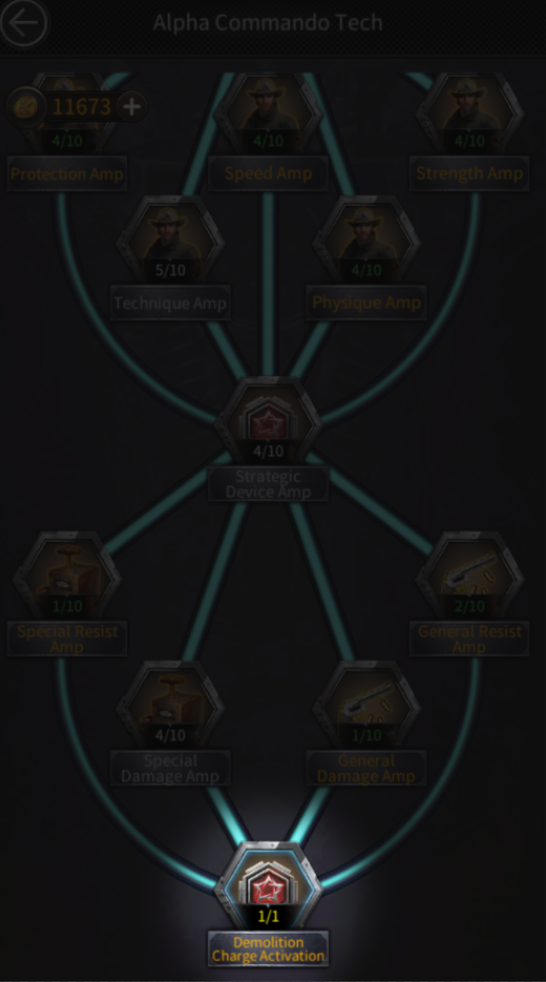
Alpha commandos tech can increase the power of ops with alpha commandos. Only battle-related tech is effective when carrying the alpha commandos, while other development tech can be effective without the alpha commandos.
The alpha commandos can be upgraded and increasing their level can provide greater buffs. The strategic device feature is a unique extra system for the alpha commandos. Equipping the strategic device can also boost alpha commandos’ power.
You can get strategic devices in the tactical airdrop lottery (price is ~10€ for 2 lottery coupons [date: Mar 2025])
List of a few strategic devices.
Static Controller
Guaranteed attributes
Enemy renegade skill rate debuff -9% ~ -11%
Elite skill: leap slam probability increases and prioritizes target with the most members: 45 ~ 55
Random attributes
enemy renegade skill rate -9% ~ -11%
ATK buff
DEF buff
DMG buff
Opponent DMG debuff
Renegade attributes buff
Renegade DMG buff
Elite skills
Static Controller
Random attributes
ATK buff
DEF buff
DMG buff
Opponent DMG debuff
Renegade attributes buff
Renegade DMG buff
Static Controller
Random attributes
ATK buff
DEF buff
DMG buff
Opponent DMG debuff
Renegade attributes buff
Renegade DMG buff
Static Controller
Random attributes
ATK buff
DEF buff
DMG buff
Opponent DMG debuff
Renegade attributes buff
Renegade DMG buff
Elite skills
Static Controller
Random attributes
ATK buff
DEF buff
DMG buff
Opponent DMG debuff
Elite Skills
Leap slam – probability increases and prioritizes target with the most members
Brave cover – probability increases which increases 1 normal attack count when the skill is activated
Fire rampage – first row enemy attack probability increases
Berserker – further increases the biker’s charge probability that unlocks this skill
Penetration probability boost
Multi-Array damage – damage to rear-row enemies increases
Heavy Artilery – further increases the base attack of vehicles that unlock this skill
Defense Craft – further increases the base defense of vehicles that unlock this skill
Demolition Charge
To equip demolition charge, you have to unlock it in Alpha Commando Tech first.
Demolition Charge Effects
A list of effects you can get from demolition charge gear. If a certain tier has the same skill as lower tiers, that means you can get a higher percentage boost/buff/debuff. For example – Tier II: Increase Bulker Attack 4.5 – 5.5% – Tier III: Increase Bulker Attack 7.2 – 8.8% – Tier V: Increase Bulker Attack 18 – 22%
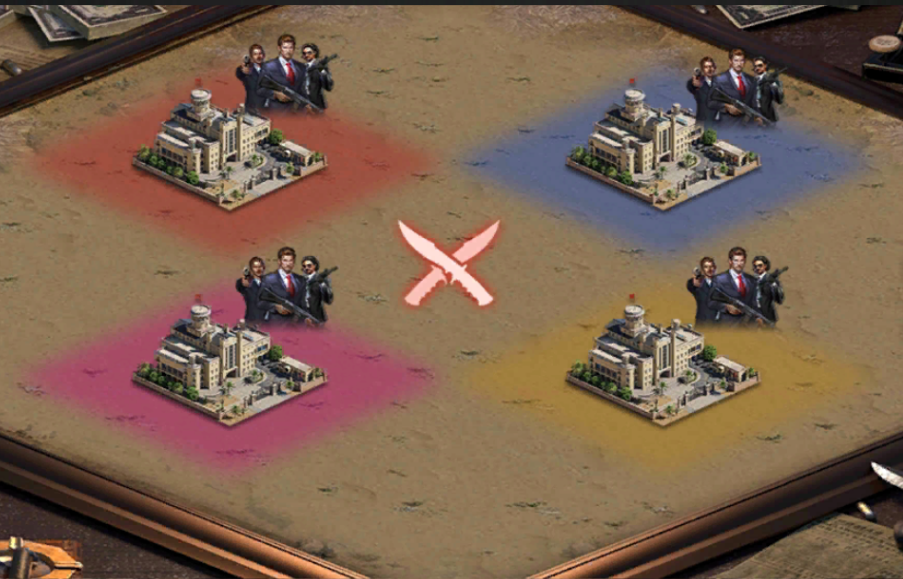
The battlefield is divided among 4 teams from different clans. After registration ends, there are a total of 2 battles during the event. After battle ends, rank and objective rewards are given based on battle points.
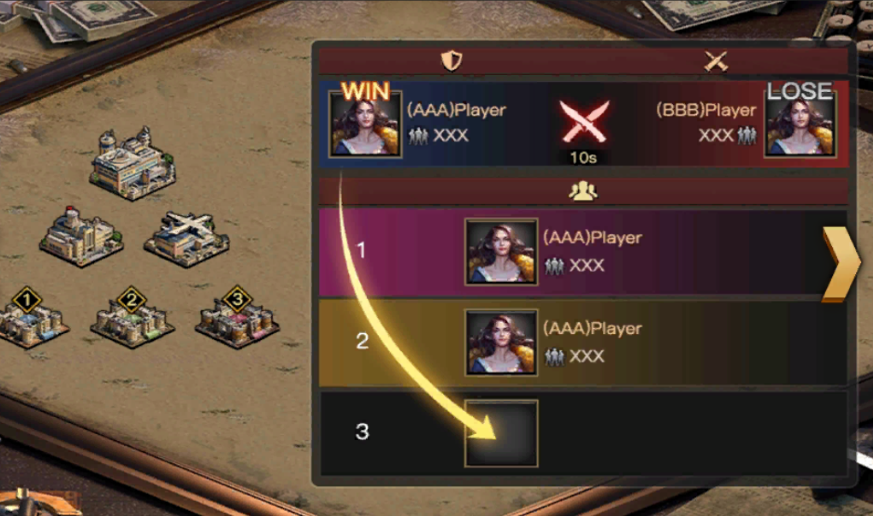
Combat Mechanics
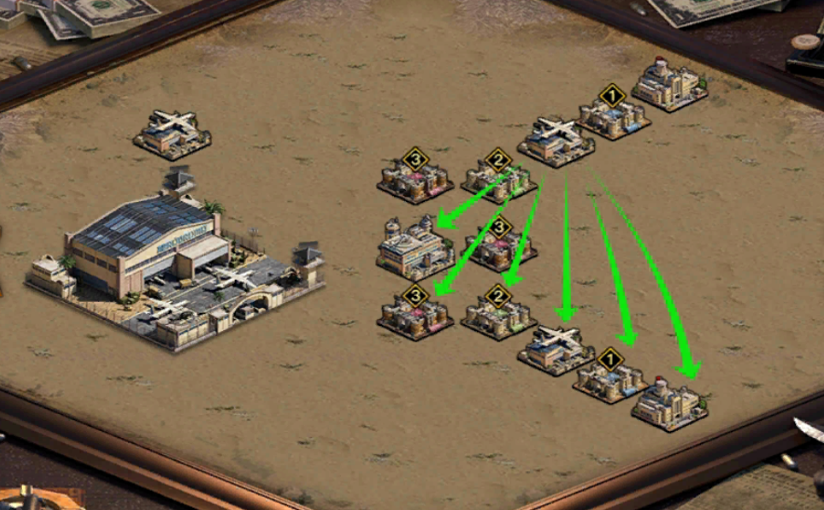
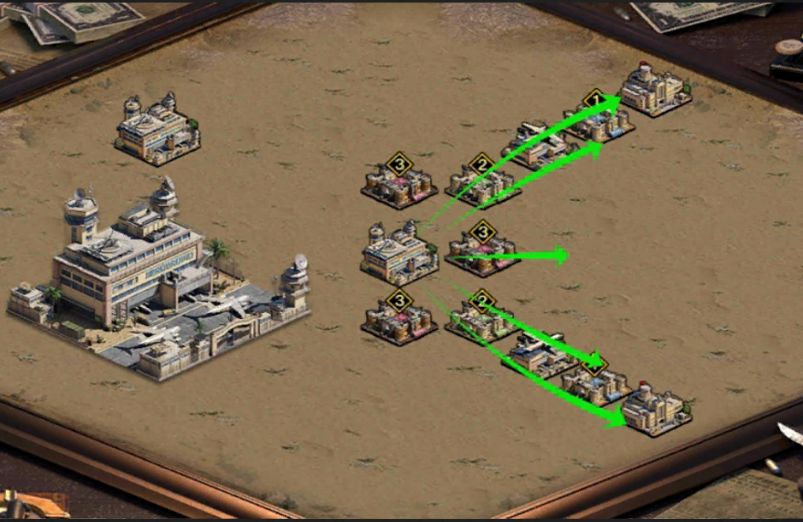
In the Air Hegemony battlefield, leaders will not be able to initiate raids except for fuel depot point sites and machinery plant point sites. All buildings allow for single-team battles. Each battle will last for 10 seconds, and the winning ops moves to the end of the battle queue afterwards.
Trust Mechanics
The Team Commander in the Air Hegemony battlefield can designate administrators, each of whom can only manage one of their own team’s strongholds. The ops dispatched by the team to the stronghold will be managed by the administrator, who can edit ops order and select attack targets, dispatching managed ops for battle.
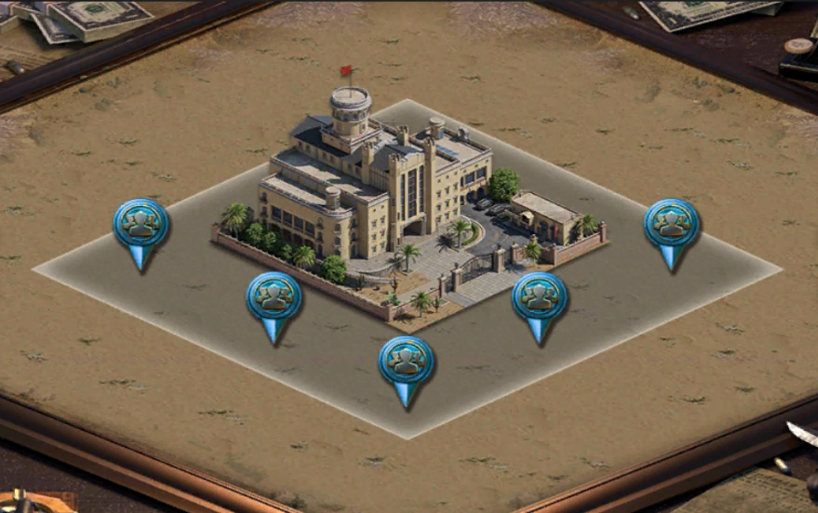
Headquarters
After entering the battlefield, Leader’s turf will be placed near HQ. Turfs cannot be relocated during the battle, and Leaders can only send ops into battle from turfs.
Basic Stronghold
Basic Strongholds must be constructed by the Team’s dispatched crew. Once completed, it belongs to your team and 1 administrator can be appointed. As long as the basic stronghold still stands, enemies cannot attack your team’s HQ.
Stronghold building
After gaining control of the Stronghold building (after the building scramble period ends), the team commander can appoint a stronghold administrator. Each leader can only manage one stronghold, and the team commander cannot serve as an administrator.
Airfield
Once the airfield building is occupied, your team can proceed to any open buildings. Ops stationed in your stronghold or turf can freely move to any location. Losing the airfield building will prevent you from proceeding to positions outside the mountains.
Central Airfield
Once the central airfield building is occupied, your team can proceed to any open building (get a 200% speed buff). Ops stationed in your stronghold or turf can freely move to any location. Losing the airfield buildings but keeping control of the central airfield building will retain access to any location and any open building on the battlefield.
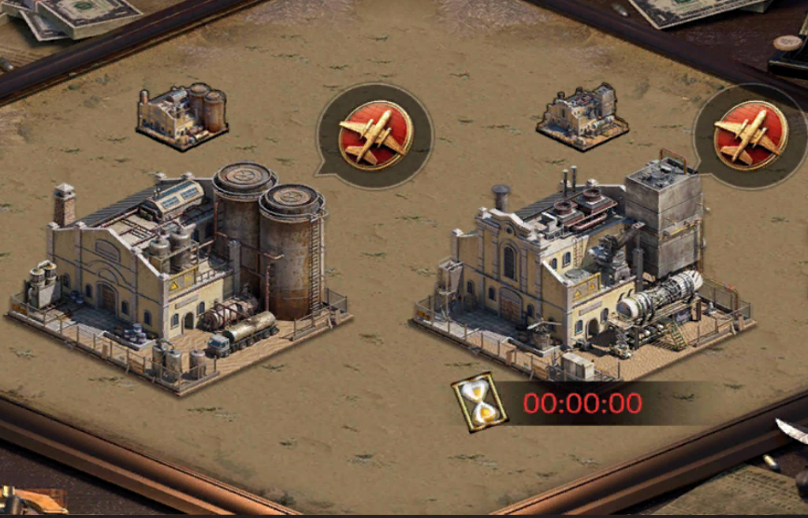
Fuel Depot & Machinery Plant Point Site
Head to Fuel Depots to continuously earn points and buff coupons. When there are 0 points left at the depot, the ops will return to the turf while the depot will disappear. The machinery plant will appear in random locations after a certain stage and will disappear after a certain amount of time. More points and buffs coupons can be earned from the machinery plant.
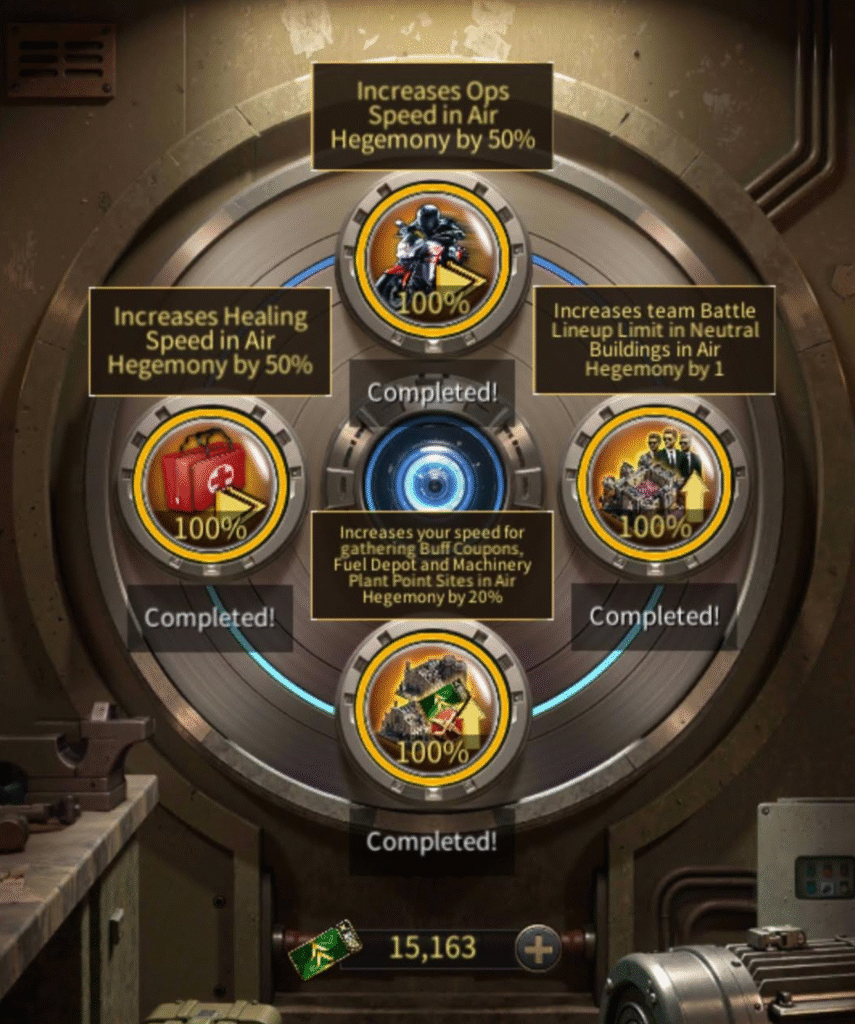
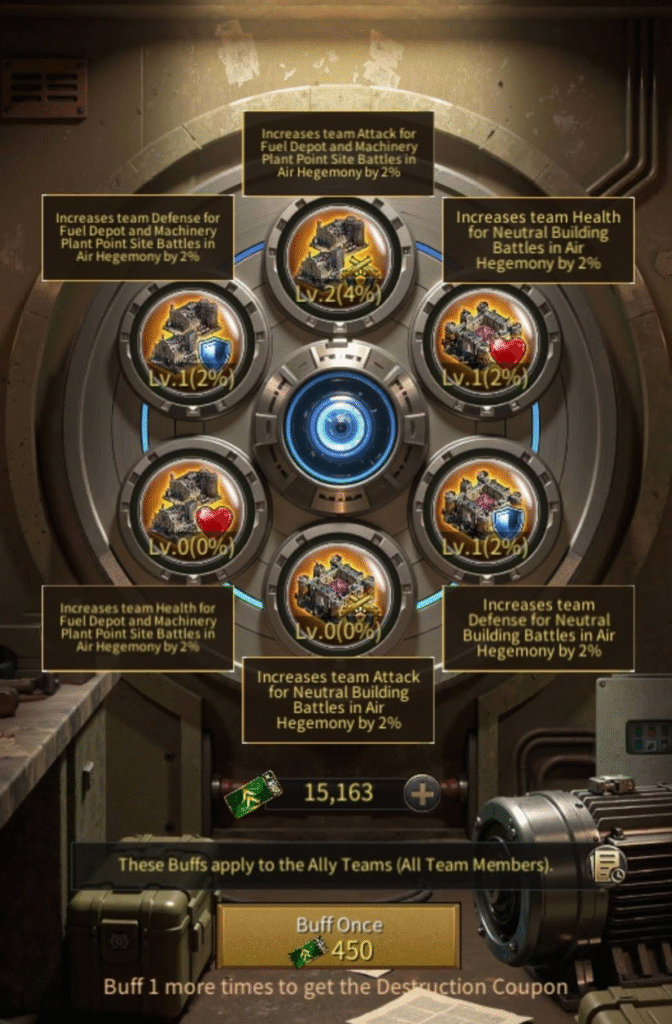
Team Tech
Team Tech consists of three core components: Team donation, Ally Strengthening, and Enemy Sabotaging. Gathering from the fuel depots and mechanical plants rewards [buff coupons], which can be used for team donation or ally strengthening. After the team donation is complete, and the team commander unlocks the team bonuses, their effect will apply immediately. Each consumption of buff coupons during ally strengthening will randomly grant an allied buff, which activates instantly.
Team Donation
Ally Strenghtning
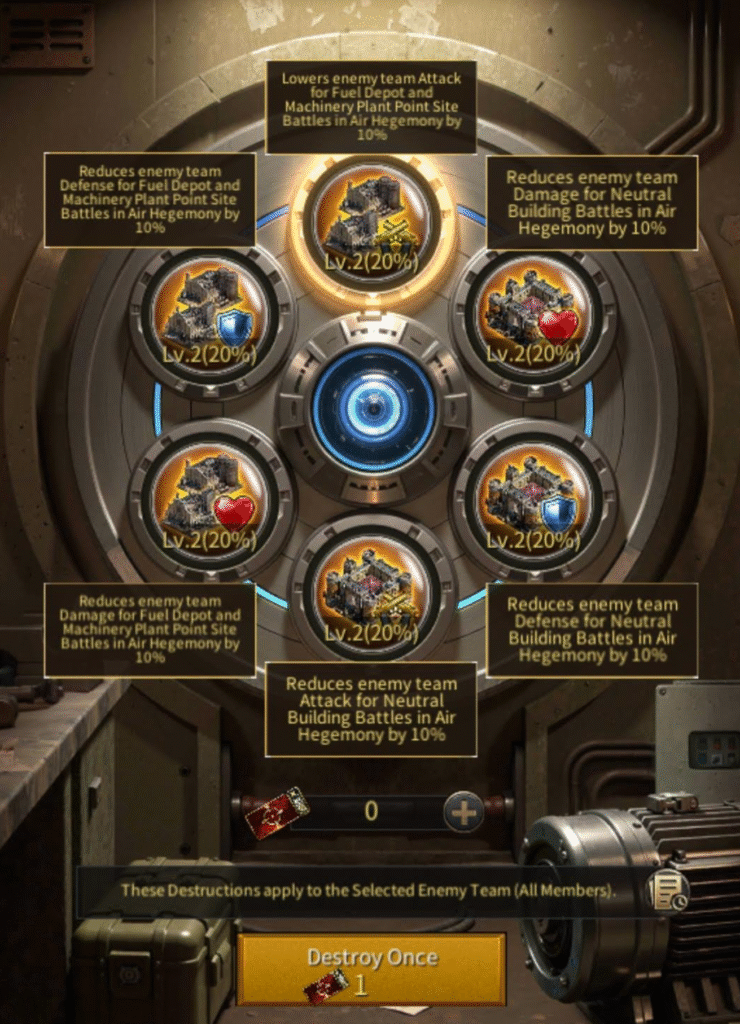
Enemy Sabotaging
RULES
Registration
The number of teams that a clan can create is determined by the total number of clan members. R4 and R5 can create teams and can exit or join teams at any time during the registration period.
Each team can accommodate 10-15 leaders. A team with fewer than 10 leaders will be deemed to have failed registration after the registration period ends.
Two sets of warfare will be launched during this event. Before each warfare, the leader can choose to join a team and select the warfare time by themselves. After registration ends, the team’s members and their registered time cannot be changed.
During the registration period, the team commander can select a member to be preset as the administrator of their basic stronghold. This member will automatically become the administrator of the basic stronghold after their team enters the battlefield and completes the basic stronghold’s construction.
Matching
After registration is completed, you will be matched with corresponding opponents based on the lineup at the time of registration. Teams of the same clan will not be matched on the same map.
Each battlefield will have four teams competing on it.
Battlefield 1v1 Queue Battle
No raids can be initiated on this map, and turfs cannot teleport away.
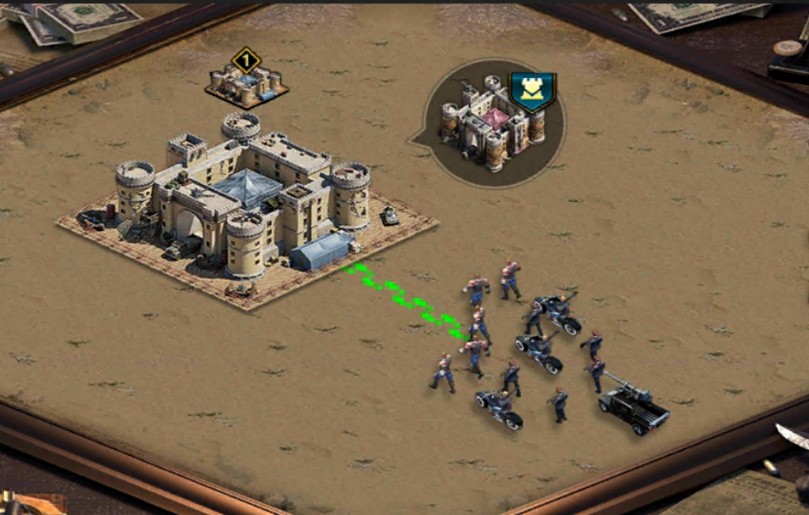
Scrambles within opened buildings are all conducted in a single ops battle format, based on the order of entering the building.
The ops that lose a battle will return to their turf while the ones that win will move to the end of the current building’s battle lineup. Afterward, the next-in-line ops of the winning team will become the defender in the next battle.
The team that wins 6 consecutive battles in a single building scramble will trigger the winning streak protection period of 30s.
For each team, a maximum of 6 ops can enter a single building to fight at the same time. When the total number of in-building ops reaches 24, the building will then trigger the [scramble cooldown period], where no more ops can enter the building for 30s.
Battlefield Stronghold Management
Team commanders cannot become the administrator of a stronghold, but they can select members of their team to serve as the administrator of strongholds that have been completely occupied and are not in the scramble period. Each team members can only serve as the administrator of 1 stronghold.
Stronghold administrators can manage allied ops sent to their management stronghold, and can choose whether to allow leaders to repatriate their ops within that stronghold.
When the stronghold administrator formats the ops, they can also select the order of their team’s ops. Then when entering the selected building to fight, the battle order is the same as the selected order.
Ops that lost a battle outside and ops repatriated by administrators will return directly to the leader’s turf.
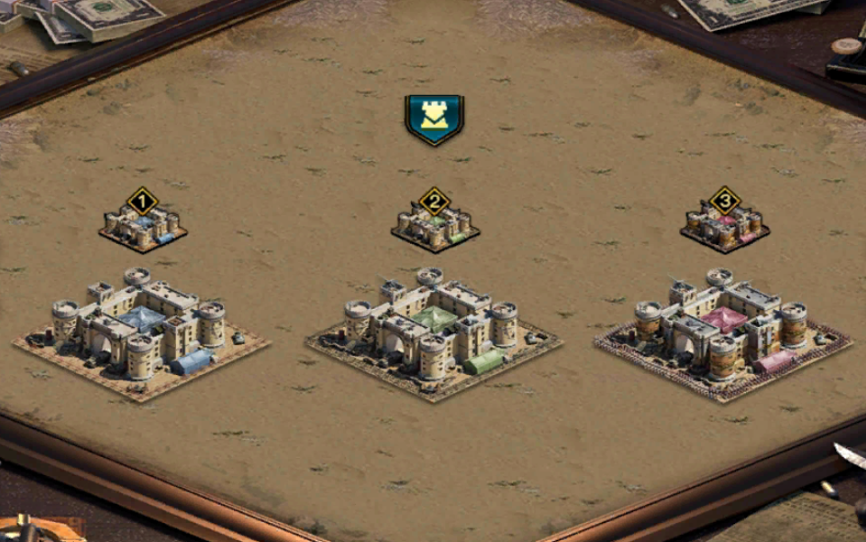
Battlefield Progression
Basic stronghold: this building requires the team’s members to send ops to build. After its construction is completed, the basic stronghold will protect their team HQ. The enemy will need to first destroy your basic stronghold before they target your team HQ.
Primary Airfield: once opened, team members need to go to capture it. After obtaining the right to occupy it, the team’s ops can begin crossing the mountains to fight over other opened buildings.
Primary and Advanced Stronghold: Once opened, team members can send ops through their controlled airfield to fight for these buildings’ control. After their scramble period ends, the occupying team can designate an administrator to manage the building and the ops within to fight.
Fuel depot point site: Teams can head to these sites to gather, and the points gathered will be counted into the personal points and team points.
Machinery plant point site: This building will start to appear randomly on the map after the primary stronghold opens. It will disappear after a period of time after its appearance, and loads of points can be obtained there.
Central Airfield: Once opened, it will remain in the scramble state until the battlefield warfare ends. The team that completely occupies the central airfield can reach any opened building through this airfield. Should a team lose control of their primary airfield but still control the central airfield, they will retain the ability to reach any opened buildings.
Team HQ, Basing Strongholds, Primary Airfields: will be opened 30 minutes before the end of the battlefield warfare. The team whose HQ is completely occupied (120s) will leave the battlefield.
POINTS
Battlefield points
Kill enemies in the airspace hegemony battlefield to earn battlefield points.
In airspace hegemony, each building has first occupation points. You can get them by being the first one to completely occupy the building (occupation time 30s). Each building has only 1 first occupation point.
Continuous occupation of buildings can earn continuous occupation points, and one continuous occupation point will be earned every 10 seconds of occupation. Less than 10 seconds will not be counted. The continuous occupation points will be included in the ranking list when the building ownership changes, every 30 minutes of the battlefield, and 5 minutes before the end of the battlefield warfare.
Go to Fuel depot point sites and Machinery plant points to get battlefield points.
All personal points will be cleared after each warfare.
TROOPS
When you occupy the resource hubs, it’s recommended you only use 1 troop so opponent doesn’t get that many points if they attack you.
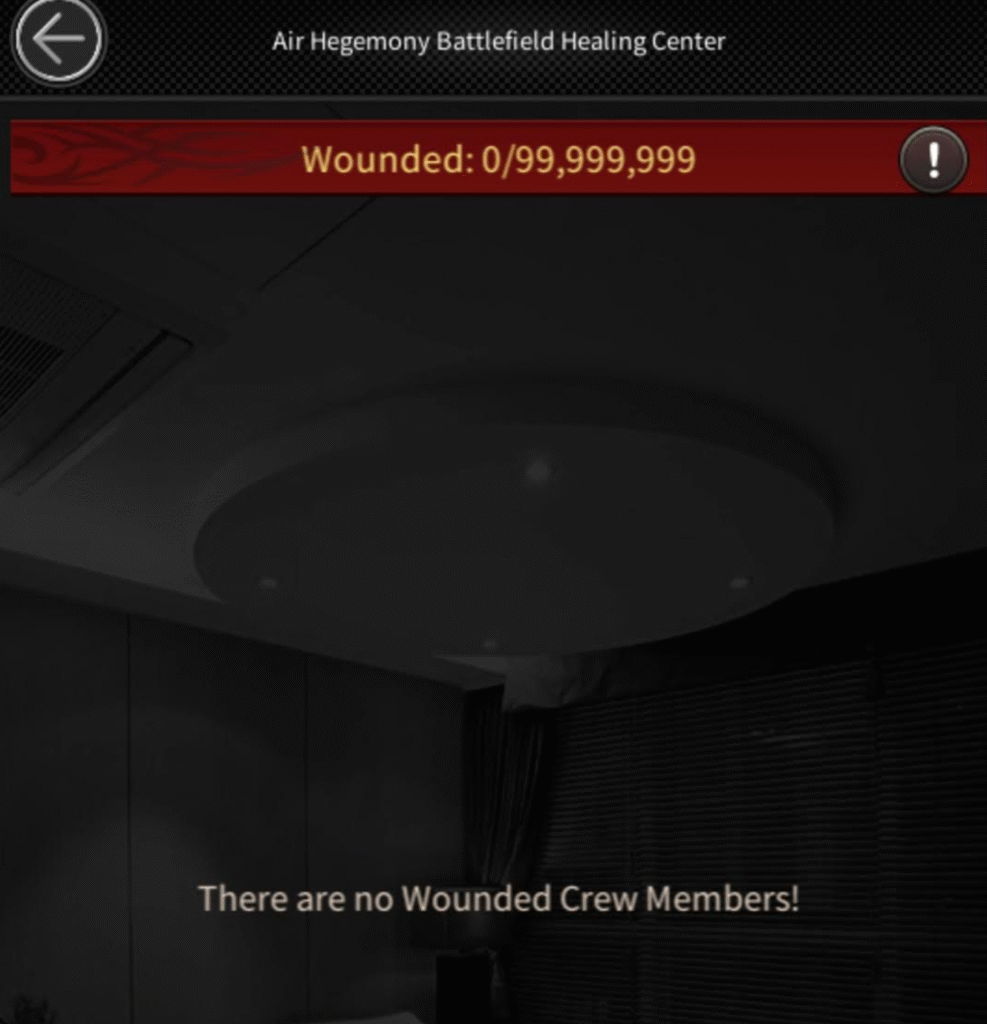
Troops are only wounded and are sent into a special event hospital, with a cap of 99M wounded.
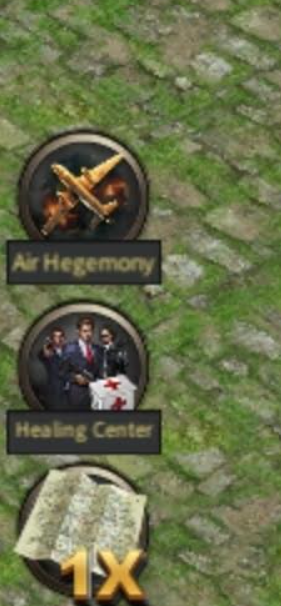
Healing center is located in the bottom left (or for some players right) corner.
We use cookies to ensure that we give you the best experience on our website. If you continue to use this site we will assume that you are happy with it.