<- Go Back
Shortcuts to event guidelines
If you are searching for season related events, click here.
Don Q - Guidelines
Shortcuts to event guidelines
If you are searching for season related events, click here.
Guide –>
Rules –>
Points –>
Troops –>
GUIDE
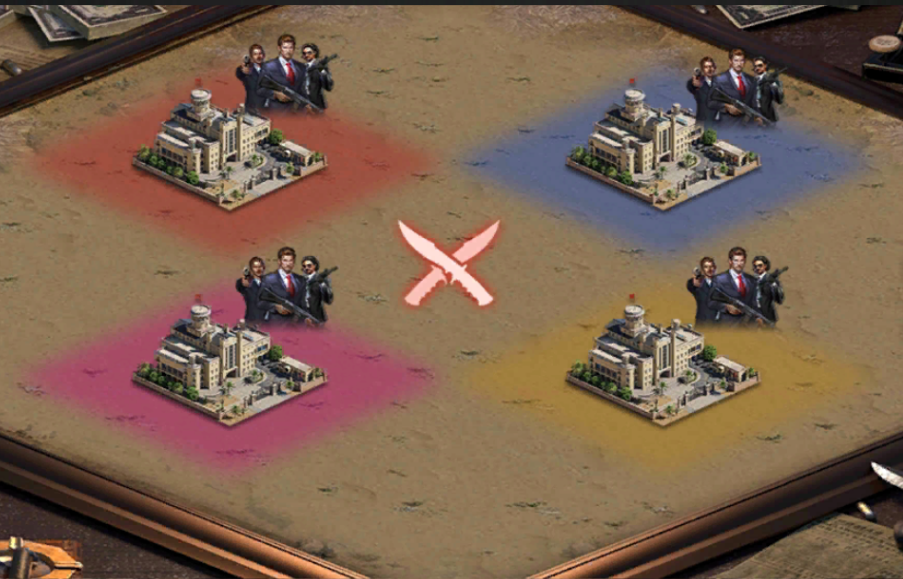
Competition Intro
The battlefield is divided among 4 teams from different clans. After registration ends, there are a total of 2 battles during the event. After battle ends, rank and objective rewards are given based on battle points.
Combat Mechanics
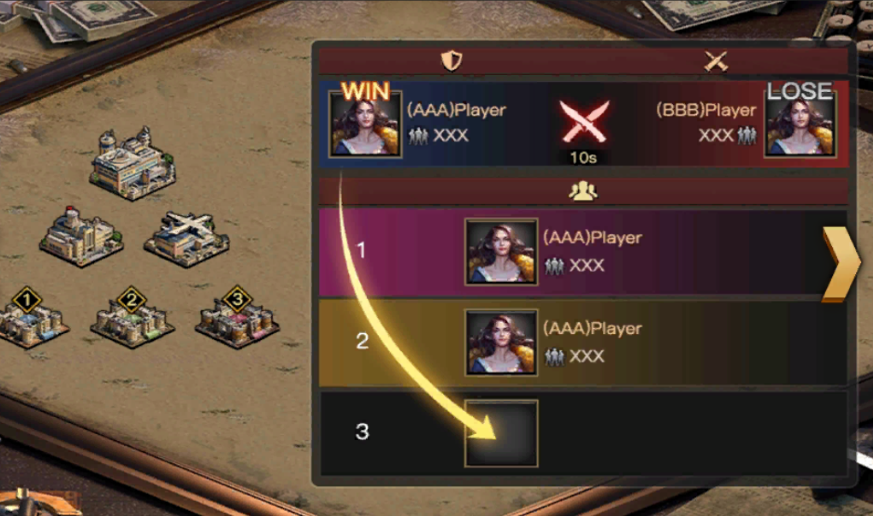
In the Air Hegemony battlefield, leaders will not be able to initiate raids except for fuel depot point sites and machinery plant point sites. All buildings allow for single-team battles. Each battle will last for 10 seconds, and the winning ops moves to the end of the battle queue afterwards.
Trust Mechanics
The Team Commander in the Air Hegemony battlefield can designate administrators, each of whom can only manage one of their own team’s strongholds. The ops dispatched by the team to the stronghold will be managed by the administrator, who can edit ops order and select attack targets, dispatching managed ops for battle.
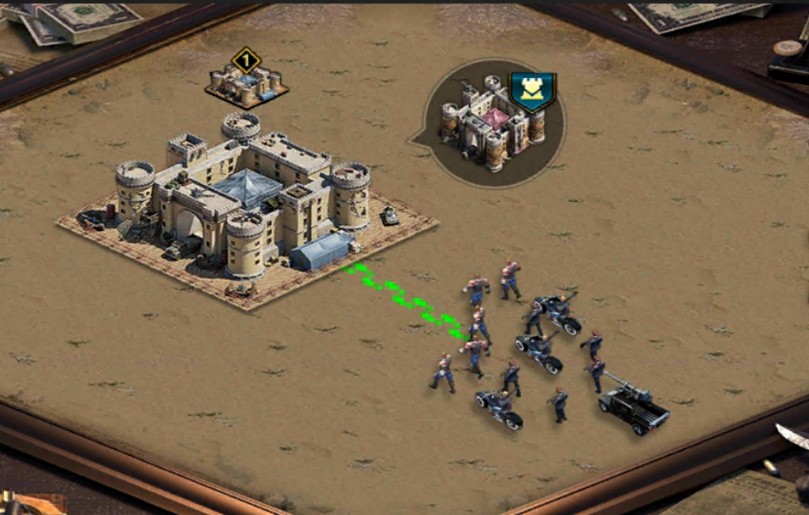
Headquarters
After entering the battlefield, Leader’s turf will be placed near HQ. Turfs cannot be relocated during the battle, and Leaders can only send ops into battle from turfs.
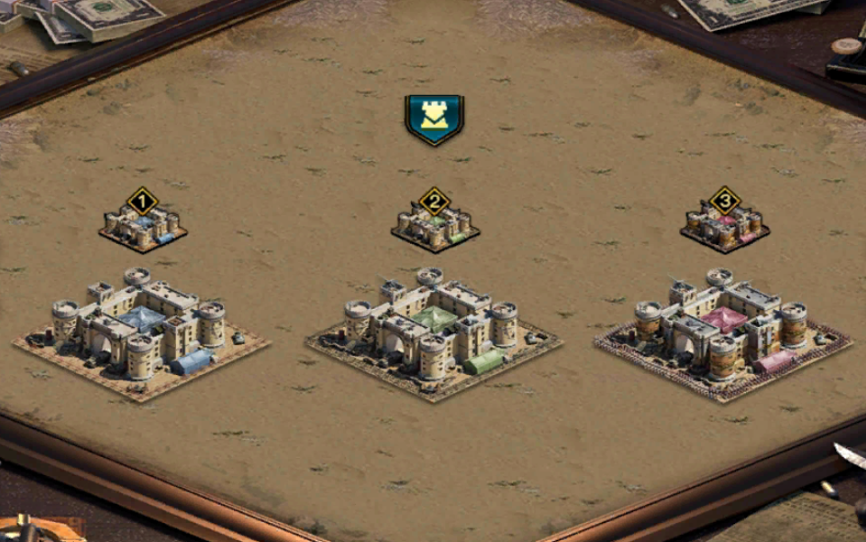
Basic Stronghold
Basic Strongholds must be constructed by the Team’s dispatched crew. Once completed, it belongs to your team and 1 administrator can be appointed. As long as the basic stronghold still stands, enemies cannot attack your team’s HQ.
Stronghold building
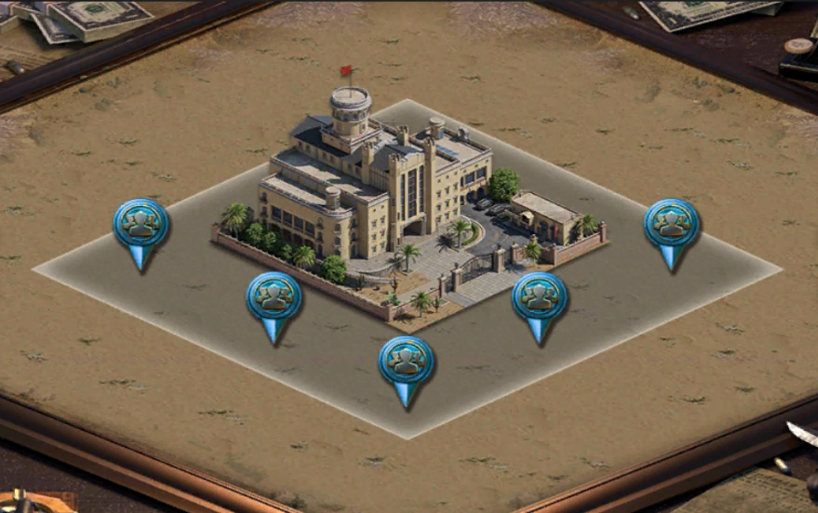
After gaining control of the Stronghold building (after the building scramble period ends), the team commander can appoint a stronghold administrator. Each leader can only manage one stronghold, and the team commander cannot serve as an administrator.
Airfield
Once the airfield building is occupied, your team can proceed to any open buildings. Ops stationed in your stronghold or turf can freely move to any location. Losing the airfield building will prevent you from proceeding to positions outside the mountains.
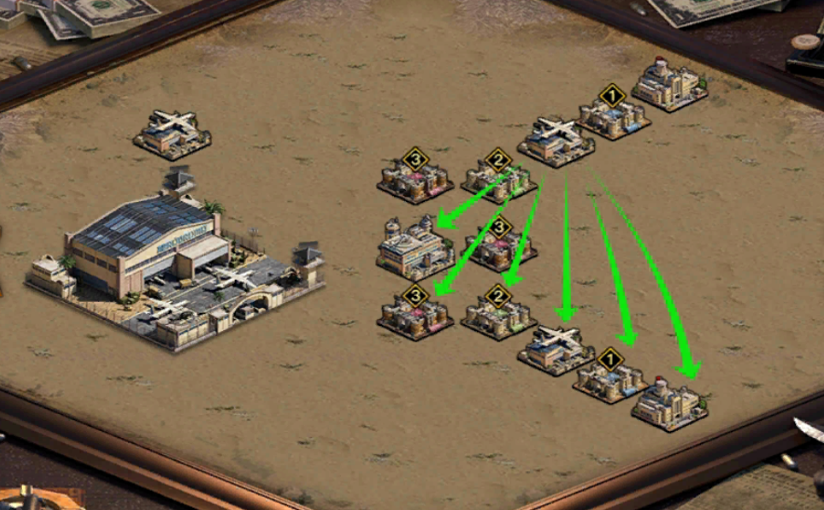
Central Airfield
Once the central airfield building is occupied, your team can proceed to any open building (get a 200% speed buff). Ops stationed in your stronghold or turf can freely move to any location. Losing the airfield buildings but keeping control of the central airfield building will retain access to any location and any open building on the battlefield.
Fuel Depot & Machinery Plant Point Site
Head to Fuel Depots to continuously earn points and buff coupons. When there are 0 points left at the depot, the ops will return to the turf while the depot will disappear. The machinery plant will appear in random locations after a certain stage and will disappear after a certain amount of time. More points and buffs coupons can be earned from the machinery plant.
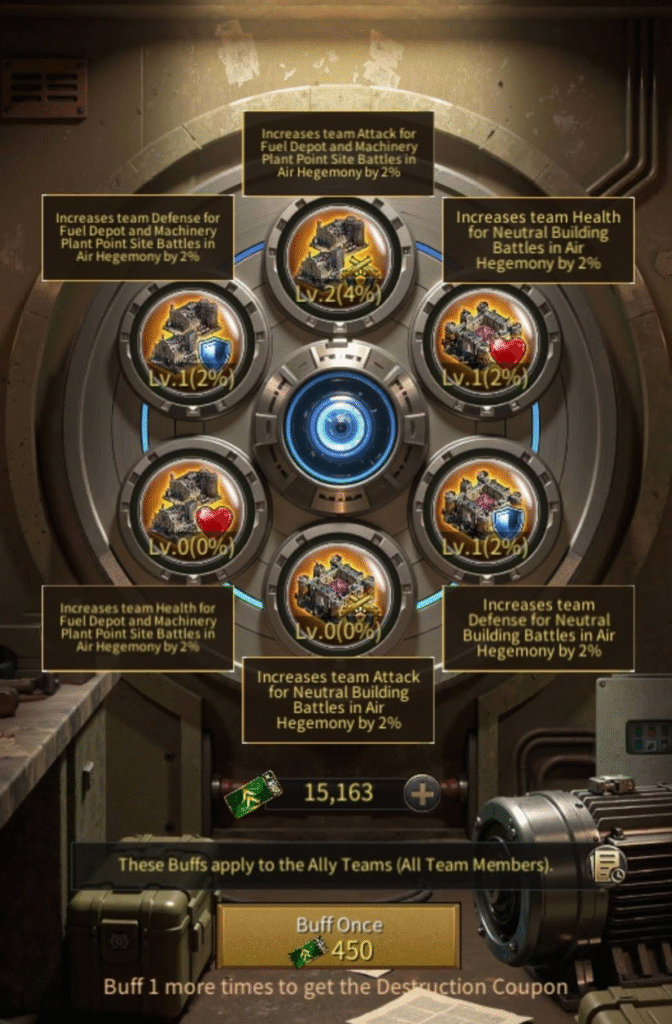
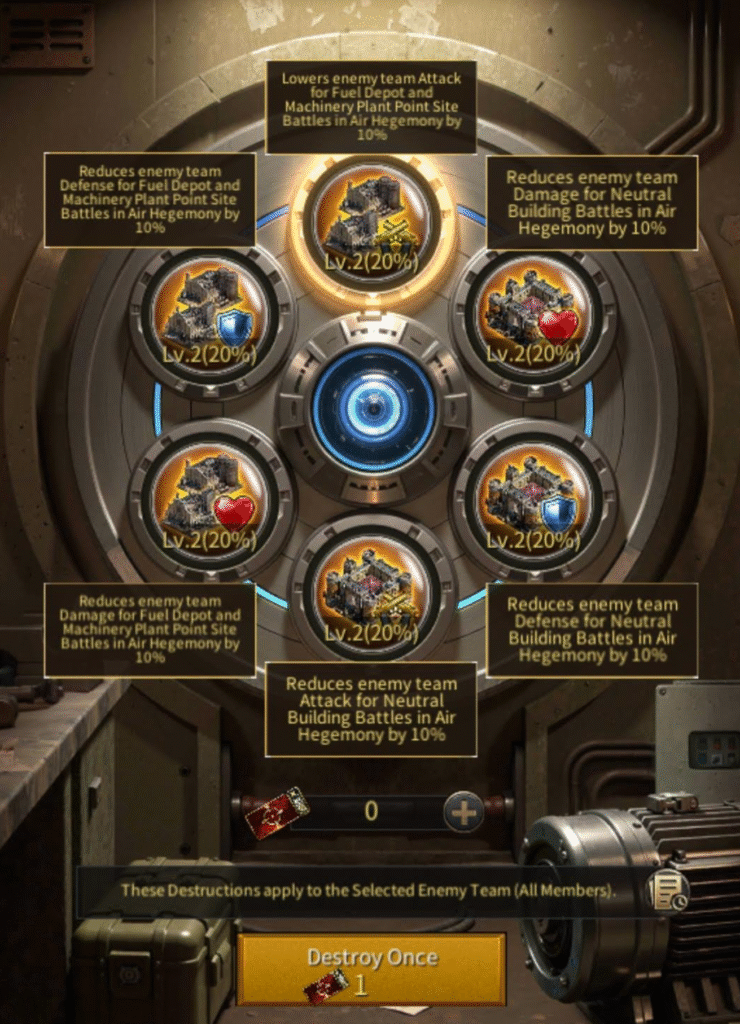
Team Tech
Team Tech consists of three core components: Team donation, Ally Strengthening, and Enemy Sabotaging.
Gathering from the fuel depots and mechanical plants rewards [buff coupons], which can be used for team donation or ally strengthening. After the team donation is complete, and the team commander unlocks the team bonuses, their effect will apply immediately. Each consumption of buff coupons during ally strengthening will randomly grant an allied buff, which activates instantly.
Team Donation
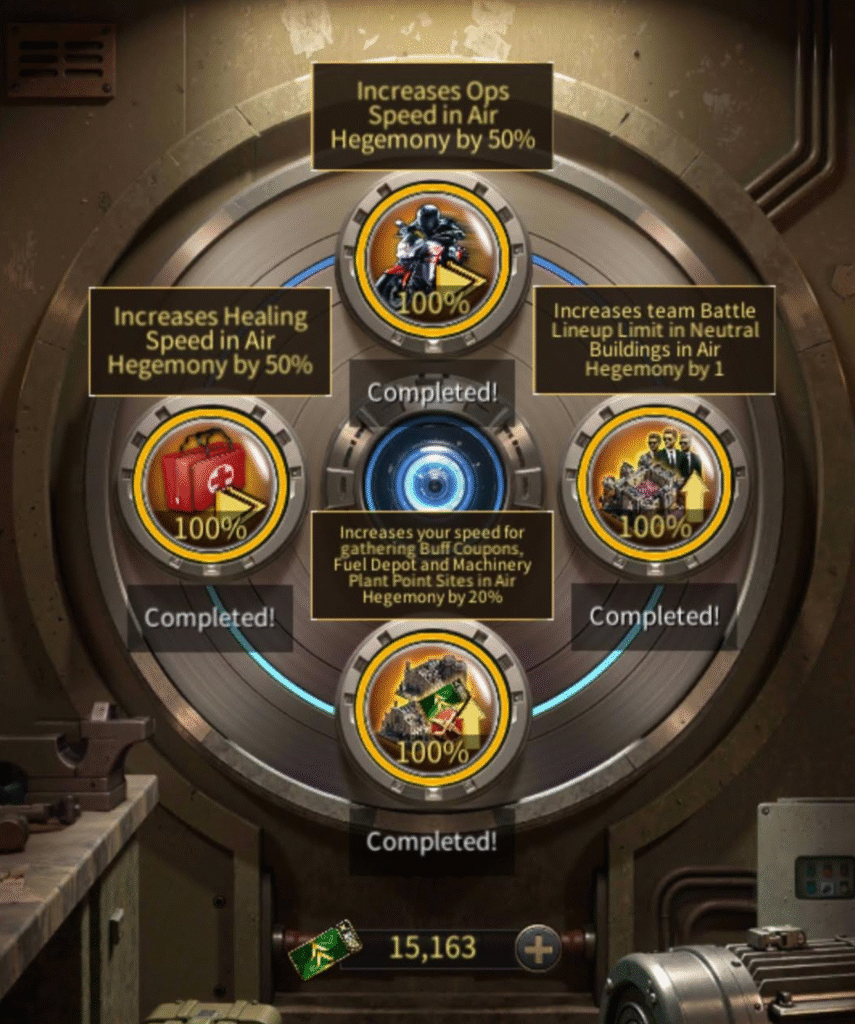
Ally Strenghtning
Enemy Sabotaging
RULES
Registration
The number of teams that a clan can create is determined by the total number of clan members. R4 and R5 can create teams and can exit or join teams at any time during the registration period.
Each team can accommodate 10-15 leaders. A team with fewer than 10 leaders will be deemed to have failed registration after the registration period ends.
Two sets of warfare will be launched during this event. Before each warfare, the leader can choose to join a team and select the warfare time by themselves. After registration ends, the team’s members and their registered time cannot be changed.
During the registration period, the team commander can select a member to be preset as the administrator of their basic stronghold. This member will automatically become the administrator of the basic stronghold after their team enters the battlefield and completes the basic stronghold’s construction.
Matching
After registration is completed, you will be matched with corresponding opponents based on the lineup at the time of registration. Teams of the same clan will not be matched on the same map.
Each battlefield will have four teams competing on it.
Battlefield 1v1 Queue Battle
No raids can be initiated on this map, and turfs cannot teleport away.
Scrambles within opened buildings are all conducted in a single ops battle format, based on the order of entering the building.
The ops that lose a battle will return to their turf while the ones that win will move to the end of the current building’s battle lineup. Afterward, the next-in-line ops of the winning team will become the defender in the next battle.
The team that wins 6 consecutive battles in a single building scramble will trigger the winning streak protection period of 30s.
For each team, a maximum of 6 ops can enter a single building to fight at the same time. When the total number of in-building ops reaches 24, the building will then trigger the [scramble cooldown period], where no more ops can enter the building for 30s.
Battlefield Stronghold Management
Team commanders cannot become the administrator of a stronghold, but they can select members of their team to serve as the administrator of strongholds that have been completely occupied and are not in the scramble period. Each team members can only serve as the administrator of 1 stronghold.
Stronghold administrators can manage allied ops sent to their management stronghold, and can choose whether to allow leaders to repatriate their ops within that stronghold.
When the stronghold administrator formats the ops, they can also select the order of their team’s ops. Then when entering the selected building to fight, the battle order is the same as the selected order.
Ops that lost a battle outside and ops repatriated by administrators will return directly to the leader’s turf.
Battlefield Progression
Basic stronghold: this building requires the team’s members to send ops to build. After its construction is completed, the basic stronghold will protect their team HQ. The enemy will need to first destroy your basic stronghold before they target your team HQ.
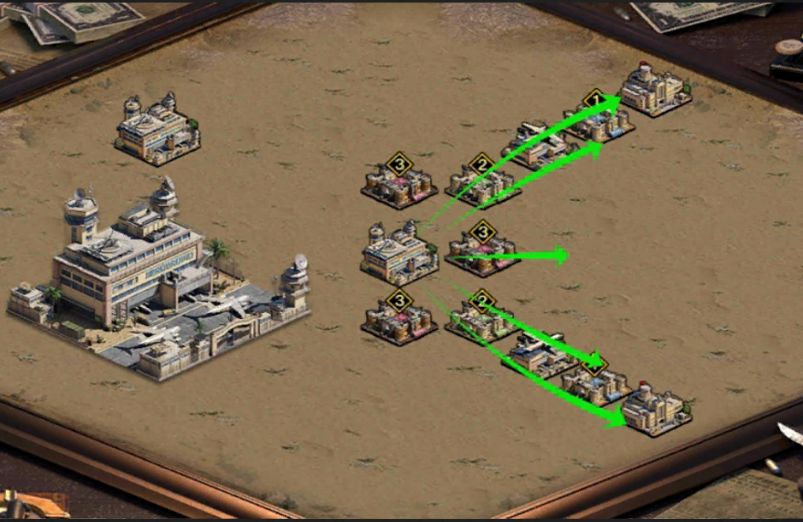
Primary Airfield: once opened, team members need to go to capture it. After obtaining the right to occupy it, the team’s ops can begin crossing the mountains to fight over other opened buildings.
Primary and Advanced Stronghold: Once opened, team members can send ops through their controlled airfield to fight for these buildings’ control. After their scramble period ends, the occupying team can designate an administrator to manage the building and the ops within to fight.
Fuel depot point site: Teams can head to these sites to gather, and the points gathered will be counted into the personal points and team points.
Machinery plant point site: This building will start to appear randomly on the map after the primary stronghold opens. It will disappear after a period of time after its appearance, and loads of points can be obtained there.
Central Airfield: Once opened, it will remain in the scramble state until the battlefield warfare ends. The team that completely occupies the central airfield can reach any opened building through this airfield. Should a team lose control of their primary airfield but still control the central airfield, they will retain the ability to reach any opened buildings.
Team HQ, Basing Strongholds, Primary Airfields: will be opened 30 minutes before the end of the battlefield warfare. The team whose HQ is completely occupied (120s) will leave the battlefield.
POINTS
Battlefield points
Kill enemies in the airspace hegemony battlefield to earn battlefield points.
T1 : 1 point
T2 : 2 points
T3 : 3 points
T4 : 4 points
T5 : 5 points
T6 : 6 points
T7 : 7 points
T8 : 8 points
T9 : 9 points
T10 : 10 points
T11 : 13 points
T12 : 16 points
T13 : 19 points
In airspace hegemony, each building has first occupation points. You can get them by being the first one to completely occupy the building (occupation time 30s). Each building has only 1 first occupation point.
Continuous occupation of buildings can earn continuous occupation points, and one continuous occupation point will be earned every 10 seconds of occupation. Less than 10 seconds will not be counted. The continuous occupation points will be included in the ranking list when the building ownership changes, every 30 minutes of the battlefield, and 5 minutes before the end of the battlefield warfare.
Go to Fuel depot point sites and Machinery plant points to get battlefield points.
All personal points will be cleared after each warfare.
TROOPS
When you occupy the resource hubs, it’s recommended you only use 1 troop so opponent doesn’t get that many points if they attack you.
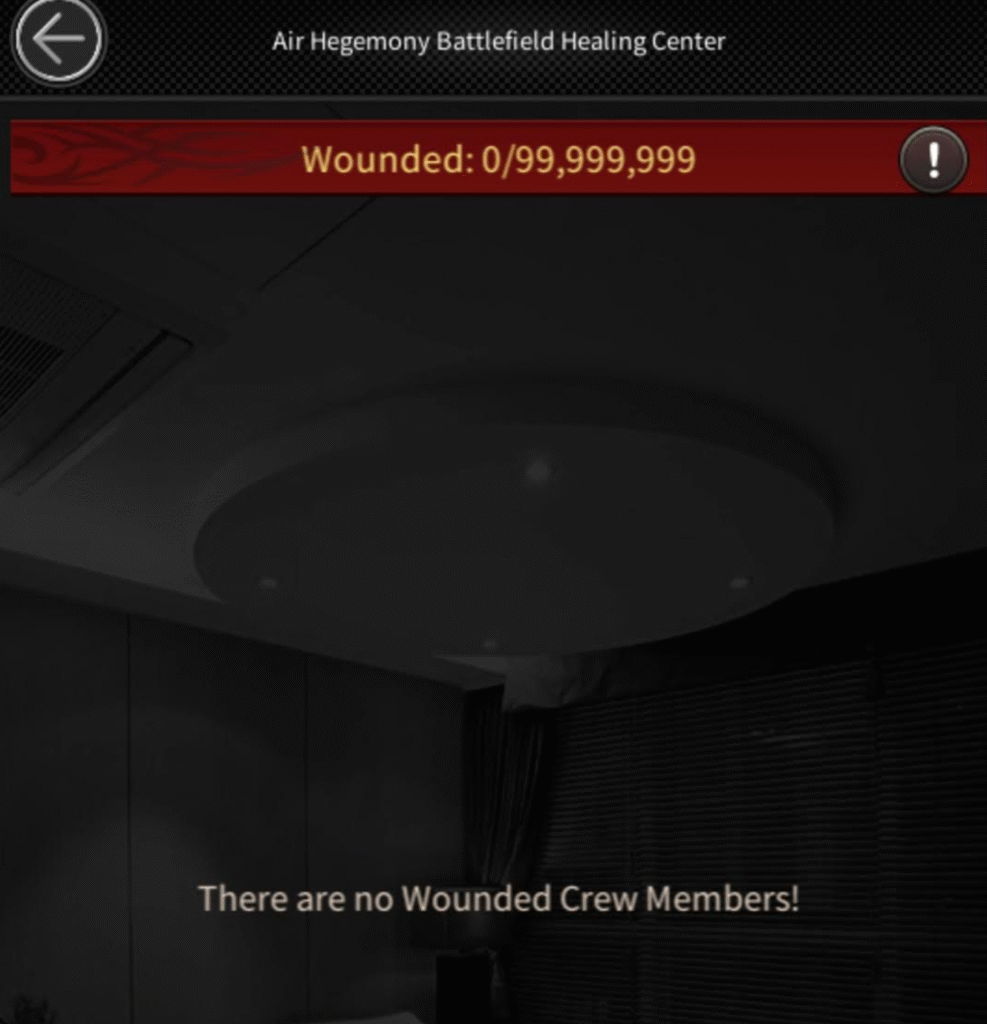
Troops are only wounded and are sent into a special event hospital, with a cap of 99M wounded.
Healing center is located in the bottom left (or for some players right) corner.

Index
– Map
– Buildings
– Skills
– Jade Appraisal Master
– Temptation Hunt
– Claim For Fame
Isle of Temptations
“Isle of Temptations” is the theme of Mafia City’s 5th Season Conquest. The entire event is divided into multiple rounds, and each round lasts 43 days, which consists of a pre-season expedition plan, an official season event, and a showcase stage.
Trophies
Trophies are explained here.
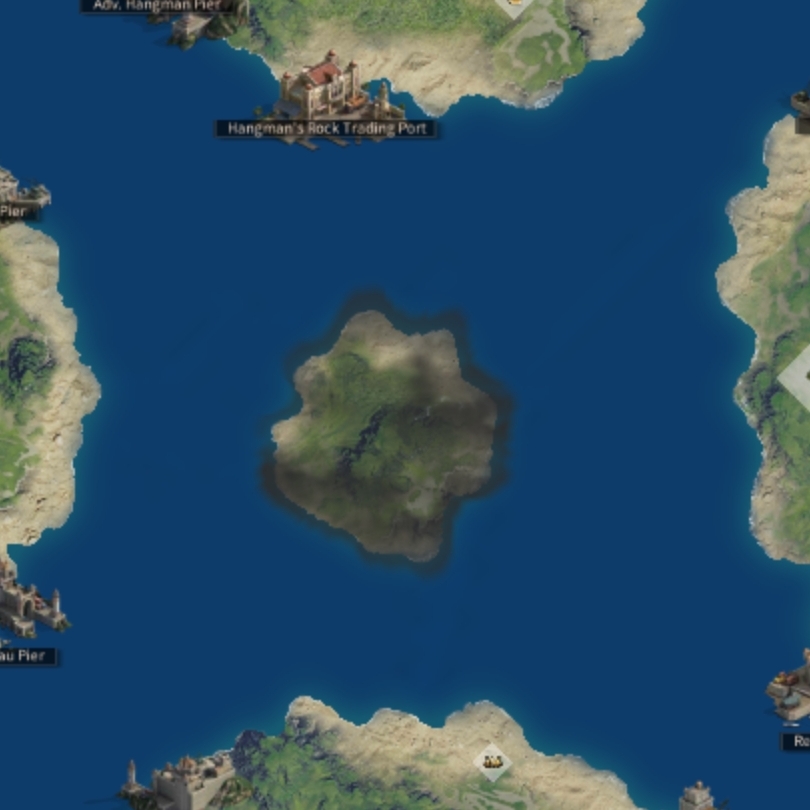
Paradise Isle Map
Leaders of 12 cities will enter the event map and appear around an expedition base in 12 different towns of the outer Paradise Isle regions. The aim is to reach and take control of the SHigetama Manor in the center of the map!

Combat Casualty Ratio (Attacker & Defender)
Combat Casualty Ratio (Attacker/Defender)
Paradise Isle Resources
Magatama – a basic resource for constructing clan buildings
Bullion – a basic material for personal contract research
Buildings (permalink)
Skills (permalink)
Jade Appraisal Master (permalink)
Jade Appraisal Master Rules
Earn Jade Stones during the event by defeating street forces. Jade stones earned this way will be counted toward objective reward progress.
The trading market has jade stones listed by leaders from other cities or by the system. Leaders can use points to buy jade stones here. However, Jade stones acquired through the trading market will not be counted toward objective reward progress.
All Jade stones can be appraised, carved or listed for sale based on the following:
All jade stones will be destroyed at the end of the event (including those that have not been removed from the listing or carved). The destroyed jade stones will not be converted into points. Please pay attention to the time of transactions and jade carvings. Lastly, remember to carve jades in time to avoid points wastage.
How Appraising works?

You have to drag this golden circle around the stone and look for shiny parts (as the one on the image above).
Temptation Hunt (permalink)
The 4 regions on the temptation hunt event map will randomly refresh daily with 4 incidents. Leaders who undertake and complete these incidents will receive rewards and some EXP for the event-exclusive character, Taro Enda. Once he reaches a certain level, leaders can claim level rewards and buffs for exploring the islands.
Four types of incidents:
– Chronicle
– Exploration
– Special games
– Small games
Things you might have to do for this event are:
– play mini-games (catching stones and minerals)
– doing certain tasks (defeat samurai, make a clan contribution…)
Claim for Fame (permalink)
Join other clan leaders in Paradise Isle to build your business region and gain different season buffs. Defeat enemies during the season to get funds for your temptation store, which are used to upgrade facilities and enhance attributes. Leaders will receive rewards and buffs based on the store’s attributes during daily settlement. Special facilities can provide unique clan buffs. Join forces with other clan leaders to create your exclusive region!
How to obtain personal points in the Seven Seas event
Reward for acquiring 80.000 personal points.
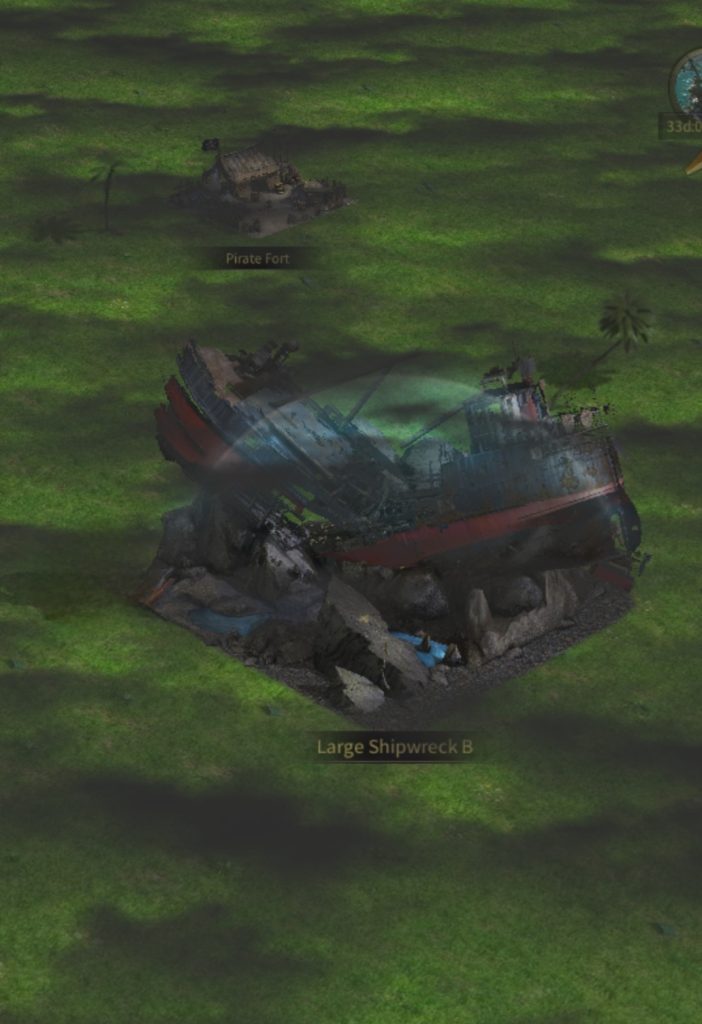
Trading Ports
Upon unlocking the trading ports, leaders can send ops there for Ship Repairs. After that, Maritime Trade can be unlocked at the Council Hall.
Lookout Towers
Build lookout towers to reach Security Base, Neutral Buildings and more. Once you occupy one neutral building, adjacent neutral buildings can also be occupied.
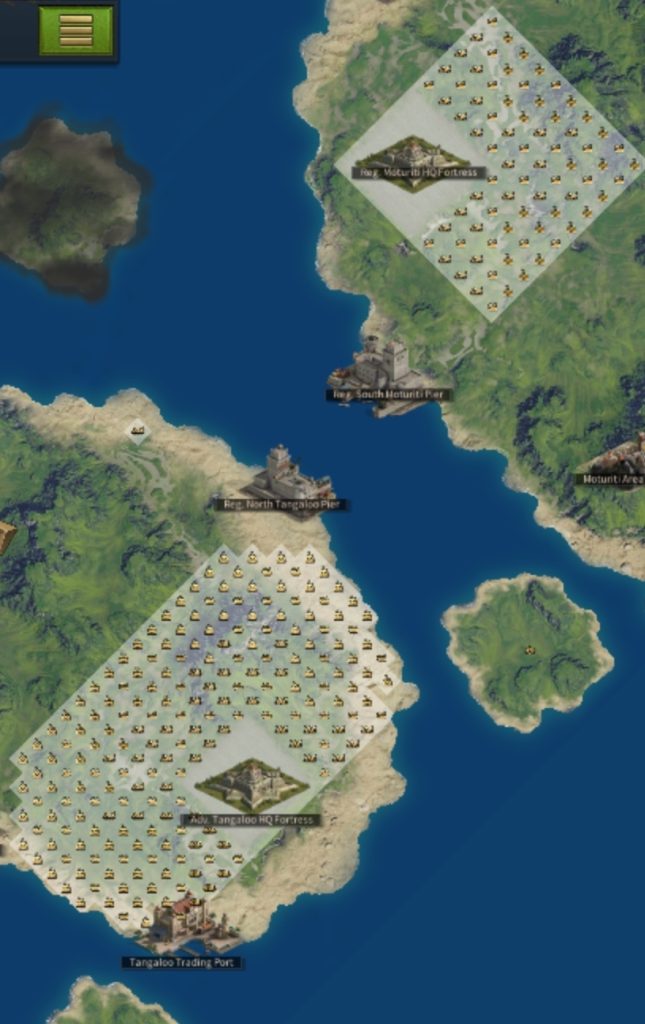
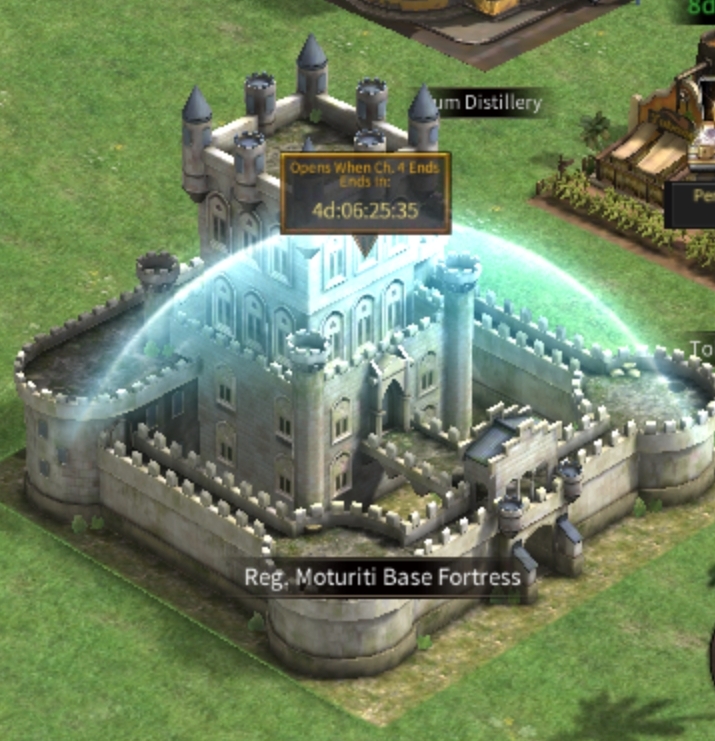
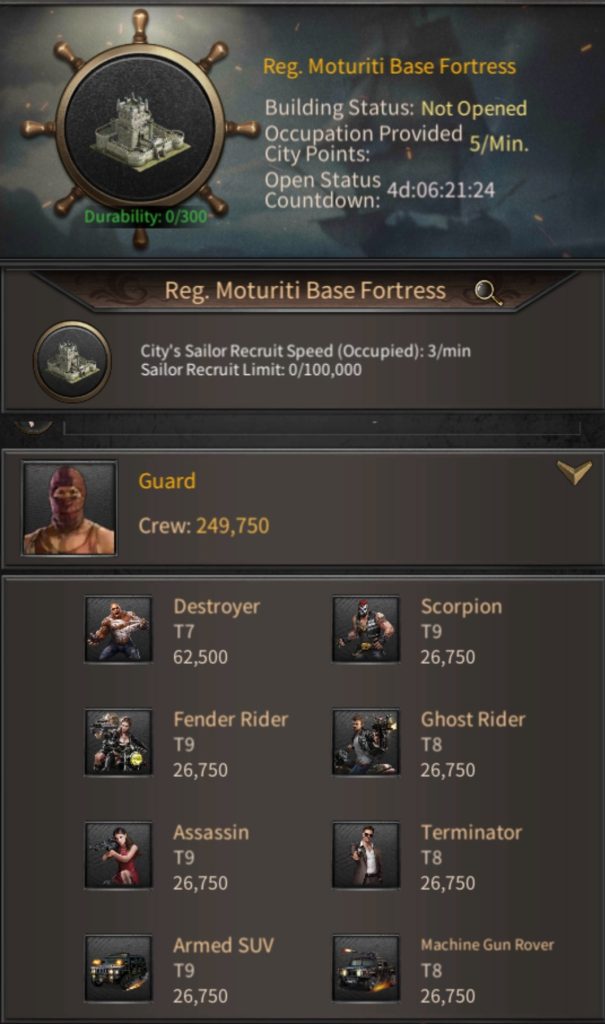
HQ Fortress
If your city occupies a neutral building that’s adjacent to the HQ Fortress, you can attack HQ Fortress, occupy it then proclaim the domain. Proclaiming a domain may take some time, but once it’s done, it will bring significant assets to your city.
Lv. 2 Security Base
Reach Security base through the lookout towers, after which the base will establish a connection with the next island’s base. When two security bases are in the same state, you can teleport your mansion to the island where the connected base resides.
In the storm islands, you can only send ops to the island where your mansion resides. You cannot send ops to other islands.
Goods
There are 4 types of goods. Textile, Artwork, Spice and Jewelry. To get these goods you have to attack in-season wandering pirates and in-season mercenaries. Goods can be gathered from first 20 NPCs.
Maritime Trades (permalink)
Trading ports unlock after first chapter ends (a day after season map opens).
Once it’s unlocked, you have to repair 3 ships by sending 3 ops to the port. It doesn’t matter how many troops you send (it’s recommended you send the fastest troop – a biker).
There are 3 different types of ships.
Once any of your ships is repaired you unlock weapons (limit: 300 weapons at a time).
Once all your ships are repaired, you can send them to other ports where you can trade various goods.
Each island offers different goods for different prices. The price of goods on each island will change every 6 hours, and any ships dispatched before the change will trade according to the price when they began their trip.
When you select what island you want to go to, you will be asked whether you want to ship or pillage. For shipping you can use the merchant or turret ship, and for pillage you can use turret or torpedo ship.
Shipping
For shipping you have to add goods and weapons to the ship. Add maximum number of weapons to minimize the loss of goods if plundered.
| Island | Personal Points Gained |
|---|---|
| Small Island | 120 base points *60 extra points |
| Average Island | 140 base points *70 extra points |
| Advanced Island | 160 base points *80 extra points |
Pillaging
For pillaging you can only select number of weapons. It’s recommended to use maximum number of weapons if plundered.
| Island | Personal Points Gained |
|---|---|
| Small Island | 50 base points *200 extra points |
| Average Island | 60 base points *230 extra points |
| Advanced Island | 70 base points *260 extra points |
Plundering
The ratio of pirate coins acquired is based on the difference in the number of weapons on each ship. Each ship can be plundered up to 3 times. Transportation ships can only be plundered on the return course of a trip. If a ship on its return course has less than 20% of its pirate coin capacity, it will not be plundered again.
If you send your ships to plunder, they will look for other ships for 60/70/80 minutes. At the end they will bring some coins, depending on number of ships they will find, and you will also lose the weapons in the process.
Trip Time
For all 3 ships, complete trips to a Small Trading Port will take 60 minutes, trips to Average Trading Port will take 70 minutes, and trips to an Advanced Trading Port will take 80 minutes.
Fighting while travelling
If your ships gets attacked while shipping goods, you will fight them and both sides will lose some weapons and pirate coins.
Producing Weapons
When the amount of weapons owned is less than maximum capacity, weapons will automatically be produced: 1 weapon / minute, until it reaches maximum capacity again (300 weapons).
Pirate Coins
Pirate coins can be used in a pirate store.
| Item | Price [pirate coins] |
|---|---|
| 10x Silver SC Card | 800 |
| 1x 10.000 Rum | 4.000 |
| 1x 50.000 Rum | 20.000 |
| 1x 150.000 Rum | 60.000 |
| 1x 500.000 Rum | 200.000 |
| 1x 10.000 Tobacco | 4.000 |
| 1x 50.000 Tobacco | 20.000 |
| 1x 150.000 Tobacco | 60.000 |
| 1x 500.000 Tobacco | 200.000 |
| 1x 100 Mastery EXP | 25.000 |
| 100x Medallion Certificate | 500 |
| 1x Single Quality Medallion Chest | 25.000 |
| 1x Single Quality Medallion Chest II | 50.000 |
| 1x Single Quality Medallion Chest III | 150.000 |
| 1x 1.500.000 Cargo | 6.250 |
| 1x 1.500.000 Cash | 6.250 |
| 1x 250.000 Arms | 6.250 |
| 1x 62.500 Metal | 6.250 |
| 1x 500.000 Cargo | 2.500 |
| 1x 500.000 Cash | 2.500 |
| 1x 80.000 Arms | 2.500 |
| 1x 20.000 Metal | 2.500 |
| 1x 8-Hr common speedup | 4.875 |
| 1x 1-Hr common speedup | 750 |
| 1x 5-min common speedup | 80 |
| 1x Lv. 2 Resource Supply Gift | 75 |
Maximum Capacity
| Ship | Goods | Weapons |
|---|---|---|
| Merchant Ship | 10-20 | 40-110 |
| Turret Ship | 5-15 | 50-120 |
| Torpedo Ship | 60-150 |
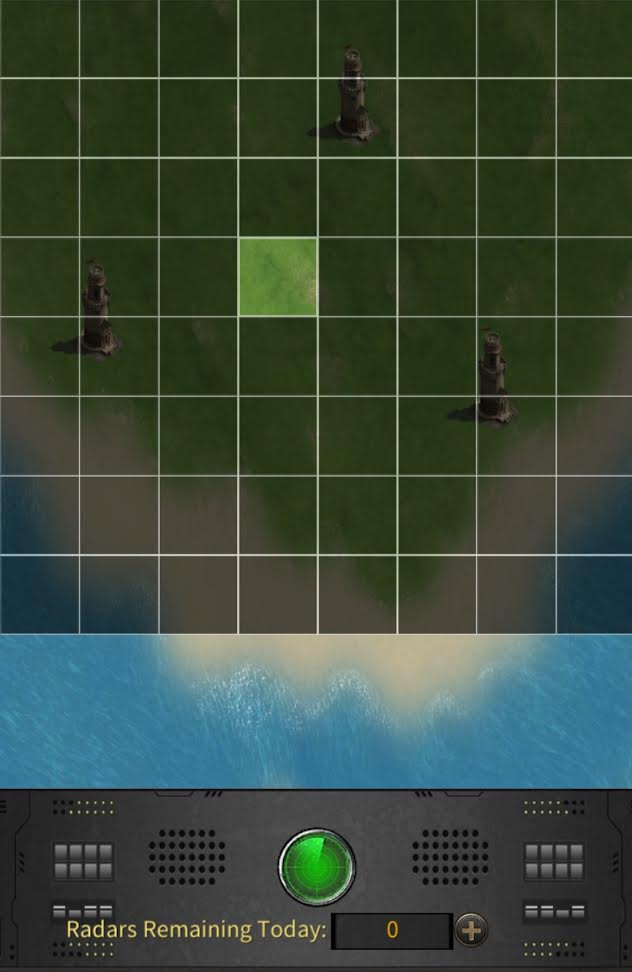
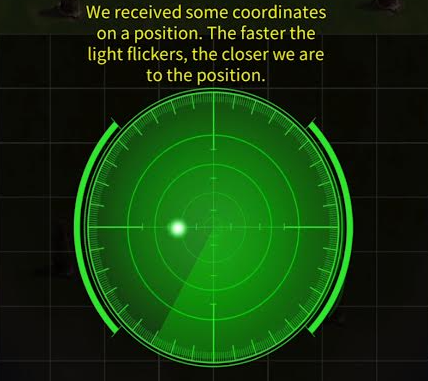
Island Recon Operation (perma link)
Drag a radar drop it on the squares and watch where the dot on the radar is. This tells you where the treasure is located relative to where you dropped the radar.
Lighthouse Event (permalink)
Three types of lighthouses
Repairing the lighthouses will bring powerful buffs and blessing to your city. Each lighthouse has its own effect.
Leaders need to send their Ops to repair lighthouses, and by repairing they will produce durability. Lighthouses are upgradeable if the city’s durability meets the required conditions. However, the lighthouses are old and will wear out over time. The wear will reduce the lighthouse’s durability, and if city leaders want to keep the lighthouse buffs, they will need to maintain and repair the lighthouses.
Providing durability to lighthouses give silver SC cards (Lighthouse tasks).
| Lighthouse | Effect | Wear Rate |
|---|---|---|
| Harvest Lighthouse | Material Development | 18.000 / hour |
| Rally Lighthouse | Crew Training | 18.000 / hour |
| Combat Lighthouse | Battle Advantages | 18.000 / hour |
The lighthouses have 10 levels. First two levels offer no effects. Levels 3-7 offer active buffs, and levels 8-10 provide blessed skills to city leaders.
| Level | Harvest | Rally | Combat |
|---|---|---|---|
| 1 | – | – | – |
| 2 | – | – | – |
| 3 | +4% gathering speed | +2% training speed | +2% crew attack |
| 4 | +8% gathering speed | +4% training speed | +4% crew attack |
| 5 | +12% gathering speed | +6% training speed | +6% crew attack |
| 6 | +16% gathering speed | +8% training speed | +8% crew attack |
| 7 | +20% gathering speed | +10% training speed | +10% crew attack |
| 8 | Harvest Blessing Level 1 | Rally Blessing Level 1 | Combat Blessing Level 1 |
| 9 | Harvest Blessing Level 2 | Rally Blessing Level 2 | Combat Blessing Level 2 |
| 10 | Harvest Blessing Level 3 | Rally Blessing Level 3 | Combat Blessing Level 3 |
Blessings
Maintenance Stones
Eye of the Storm (permalink)
Location of the event
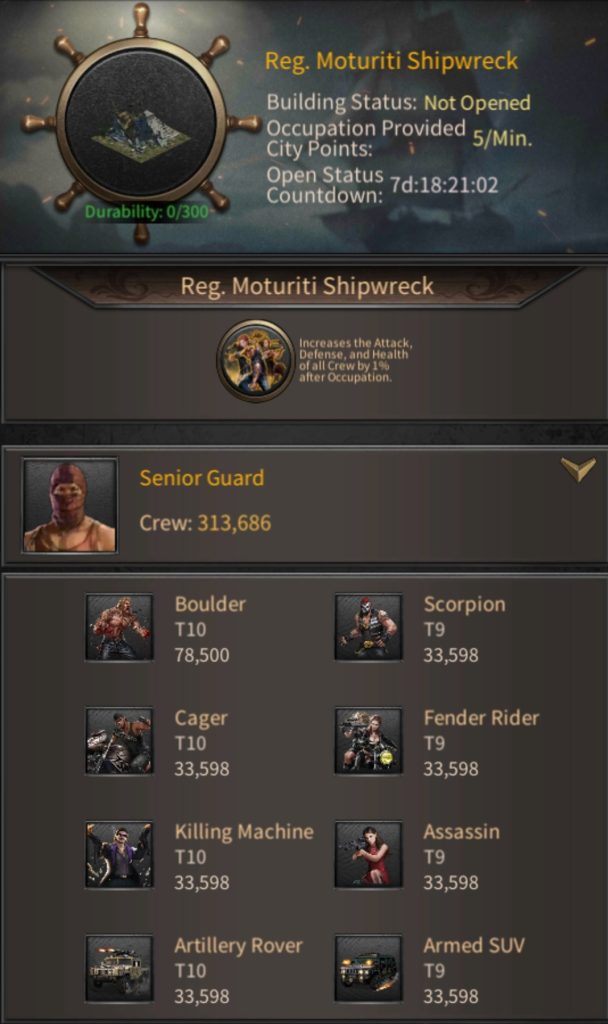
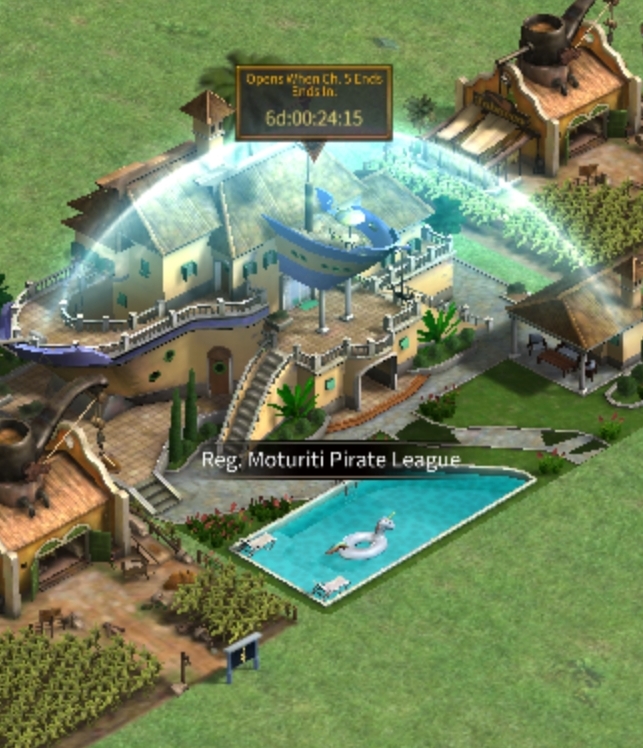
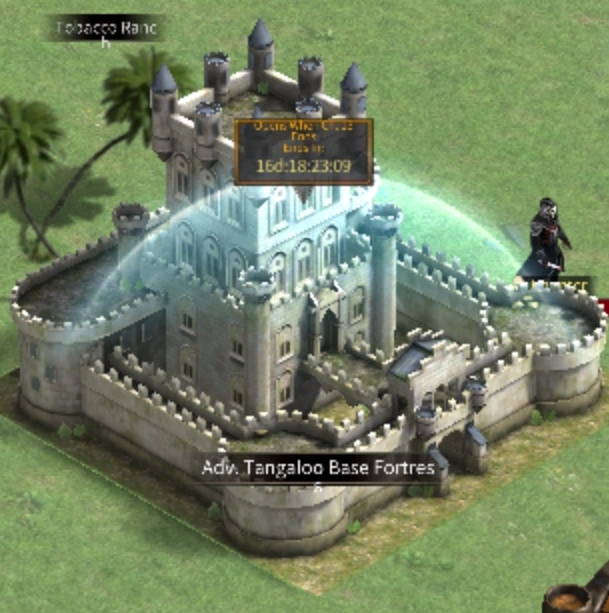
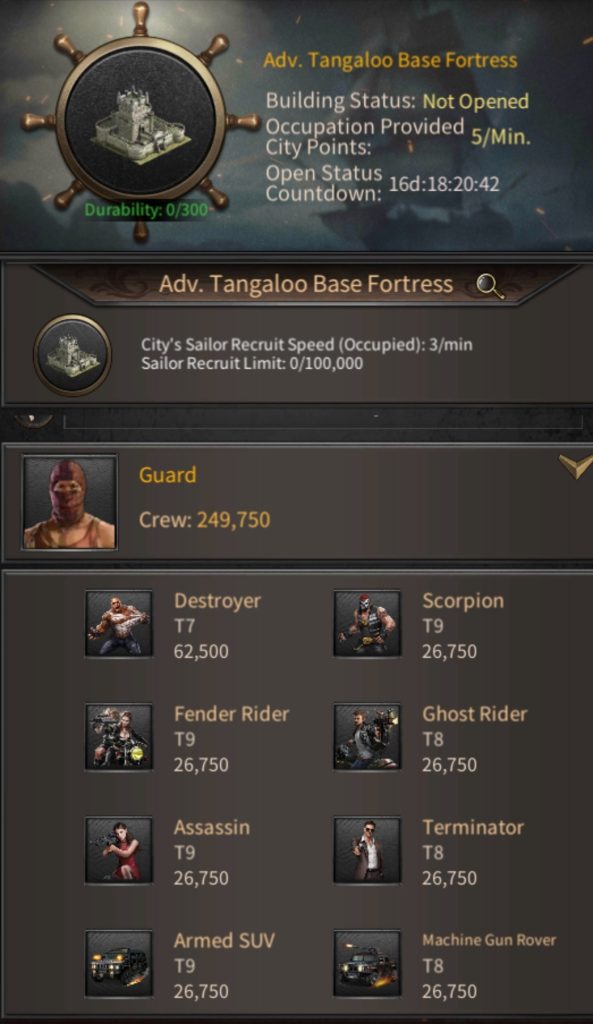
Buildings that provide City Points (permalink)
Listed buildings are located in these areas.

Special Skills (permalink)
Off-Radar Assault
After activation, increases crew damage by 50%, and prevents next solo attack from appearing on the target’s radar, with ops trail only visible to you.
Dying Revenge
After activation, enter a Death Keeper state, where for 30 minutes, the souls of all your lost crew will be collected to form a team at the end of this state. This team can be used to initiate one solo attack on an enemy turf.
Hostile Treasury
After activation, locate a nearby rival mercenary (reaches your turf in 5 minutes) that will give random season materials equivalent to the highest-leveled resource tile if fended off.
Long Shot
After activation, get a +100% gathering, crew training or healing speed buff lasting 1 hour, or a -20% cost buff on your next researched island contract (these buffs only take effect in seven seas.)
Two-Edged Returns
Doubles mercenary/wandering pirate ops damage, their energy cost, and drop reward for 2 hours (each attack is counted 2 times).
Territorial Motion
After activation, the max travel time of all ops within the range of lookout towers will be 5 minutes for 30 minutes (if activated with “total roadblock” skill, the latter activated one will override the first.)
Overkill Spree
After activation, increases overkill ratio of your clan member, when attacking with a 9×9 area around your turf by 5% for 1 hour.
Early Warning Radar
For 15 minutes after skill activation, have the detection level of clan members’ radar max out while rendering enemies’ stealth operation invalid and can effectively counter off the off-radar assault skill.
Banishment
After skill activation, make the picked clan member unable to attack others or be attacked for 1 hour (this skill will cause the disbanding of any raid they participate in and send back any crew garrisoned outside.)
Siege Team
For 5 minutes after skill activation, the clan members’ attack on defenders of lookout towers and neutral buildings will ignore 25% of their defense and lower their own crew’s defense by 25%
Cunning Smuggler
For 30 minutes after skill activation, boost the season material gained by clan members via gathering (after returning to turf) by 25%.
High-Speed SUV
For 30-mins after skill activation boost the gathering speed and ops speed of clan members by 50%.
Engineering Master
For 30 minutes after skill activation, boost the construction speed of clan lookout towers by 100% (this speed my be affected if the skill user exits the lookout tower.)
Artillery Suppression
After skill activation, deal damage to 10% of the crew garrisoned in the picked enemy lookout tower (its region must be connected to your faction) after a 5-min countdown.
Total Roadblock
For 2 hours after skill activation, drastically reduce the ops speed of the picked leader turf (the latter activated skill will override the first if this skill is activated with the “territorial motion” one.)
Mega Bomb
For 30 minutes after skill activation, the clan members’ next single attack victory on an enemy turf will force its current location and restricted from returning there or its surrounding 9×9 area for 24 hours.
Charge Together
For 1 hour after skill activation, boost the damage stat of any clan member within a 9×9 radius of the picked clan member’s turf by 100%.
Emergency Recruitment
After skill activation, remove all negative skill effects on the picked clan member and make them invulnerable to those effects for 12 hours.
Assault Medic Aid
For 1 hour after skill activation boost the overkill ratio of any clan member within 9×9 radius of the picked clan member’s turf by 5%.
Weather Conditions
For more info about seven seas weather conditions, click here.
This event lasts 5 days, and leaders can attain points using the “Item of the Day”.
Reach point milestones to collect rewards.
Item of the day
| Day | Item |
|---|---|
| Day 1 | Vigilante Frags (Gold / Purple) |
| Day 2 | Substance – Z |
| Day 3 | Hitman Coins |
| Day 4 | Training Speedups |
| Day 5 | Vigilante Training Manuals |
Extra Points
Leader can get extra points by training crew members during event (Day 4’s training does not count).
3 points per 4 T10 troops
5 points per 3 T11 troops
8 points per 2 T12 troops
Points Rankings
During the event, Points obtained will rank a Leader in the Daily Global Rankings and the overall Global Rankings. Work your way to the top for excellent rewards!
Daily rank rewards are sent via mail the next day after settlement, and overall rank rewards are sent when the event ends.
During the event leader receives 4 types of benefits related to the family. They are as follows:
Leaders get family token and family gold by defeating the blazing riders (limit: 20/day). Leaders also receive family development points for each family gold spent and reputation acquired during the period of this event. Additionally, leaders get rewards for completing event tasks. Uncollected rewards are sent via mail after the event ends (excludes daily sign-in rewards).
Hint: Use Blue Devil car for defeating blazing riders. Reward you get is doubled and you also complete them faster (note: energy usage is also doubled 20 energy per rider).
Hint: Attack the first rider normally and then the rest (19 left) with blue devil. This way you get 21 reward instead of 20.
Leaders can claim an objective reward whenever their attained development points reach the specified milestones.

Seven milestones and points required to unlock them.
| Milestone Points | Rewards |
|---|---|
| 500k | 100x Vigilante Fragment Coupon 1x 500.000 Cargo 1x 500.000 Cash 5x Lv. 4 Custom Resource Chest |
| 1M | 10x Silver Roadster POint 5x Lv. 4 Custom Resource Chest 2x 500.000 Cargo 2x 500.000 Cash |
| 2M | 8x Family Token V 500x Substance Z 5x Lv. 4 Custom Resource Chest 1x 100.000 Vigilante EXP |
| 5M | 500x Jewelry Card 500x Hitman Coin 500x Augmentation Card 30x Lv. 4 Custom Resource Chest |
| 8M | 5.000x Hitman Coin 800x Latent Energy 800x Augmentation Card 5x Running Start Box |
| 16M | 25.000x Family Gold 1.000x Latent Energy 600x Jewelry Card 10x Running Start Box |
| 24M | 1x Dark Chess Pieces (45days) 800x Jewelry Card 1.500x Augmentation Card 10x Rose 10x Running Start Box |
Development point acquisition rules:
In cases where leaders have already reached max reputation for all the families and there are no business contracts to be developed, they can then train family crew members to obtain development points.
Reward for defeating Blazing Rider Level 5:
During this event, you get an extra 12% benefit on the usage of jewelry cards and all Babe-related VIP features are available for all leaders
By completing the tasks, you can unlock different gift boxes.

List of acquirable points per usage:
| Item | Points |
|---|---|
| Rose | 1 point |
| Jewelry Card | 1 point |
| Normal Gift | 5 points |
| Expensive Gift | 10 points |
| Luxurious Gift | 20 points |
| Limited Gift | 30 points |
| Exclusive Gift | 50 points |
| Babe Fragment | 100 points |
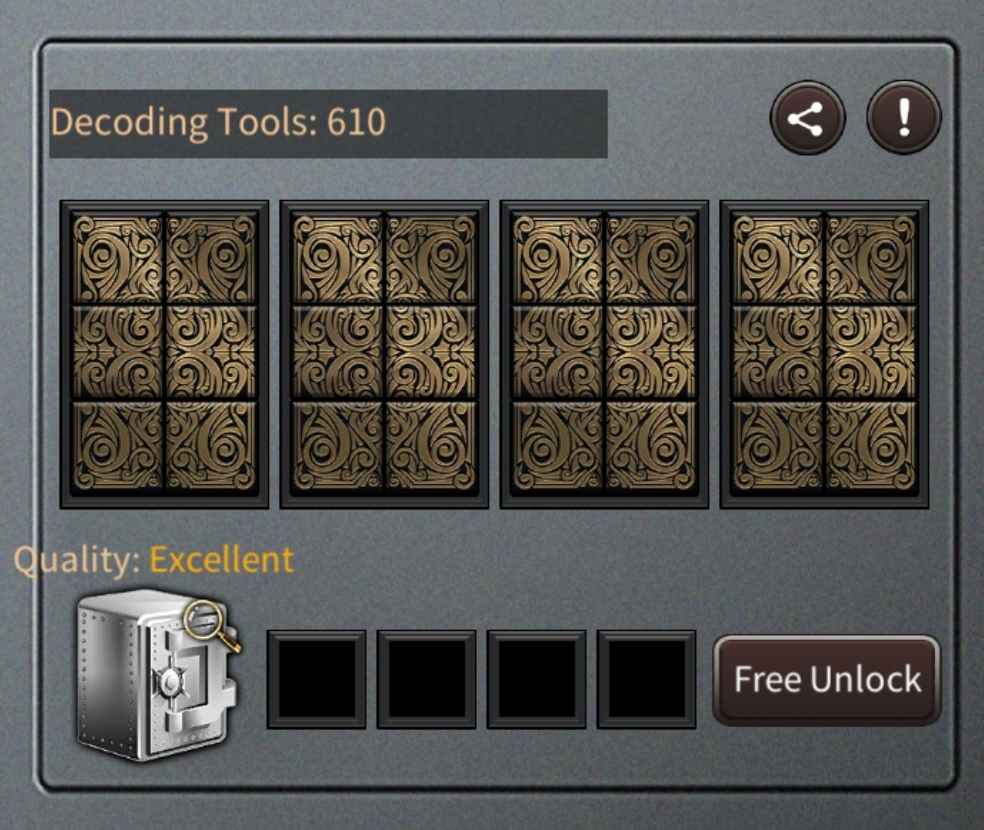
In this event, you collect decoding tools. You can get them by defeating street forces. By unlocking the safe and decoding tools, you can get classified files that can be exchanged for various vigilante fragments or resource boxes.
Tips on how to optimally decode the safe.
The fewer decoding tools you use, the better the reward.
| Tools Used | Reward Quality |
| 0-7 | Excellent |
| 8-11 | High |
| 12+ | Medium |
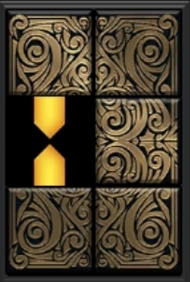
Starting point. The goal is to decode the number using as few tools as possible.
Always start with the middle left square, like this.
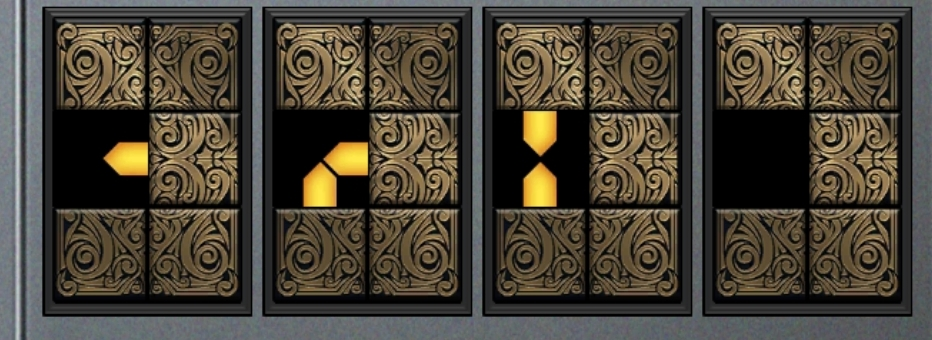
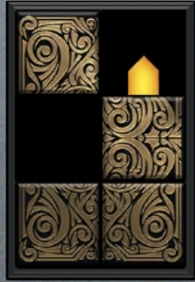
Some numbers can be decoded just by opening one box, some numbers require you to open the second box (top right corner).
| BOX | NUMBER |
 | 0 |
 | 1 |
 | 2 |
 | 3 |
 | 4 |
 | 5 |
 | 6 |
 | 7 |
 | 8 |
 | 9 |
Available rewards for unlocking the safe
Las Vegas event is held in four phases.
Preparation Phase
During this phase, players can begin gathering from Vegas shops, attacking Vegas forces, raiding corrupt cops, or battle leaders from other cities.
Rookie Casino Scramble
During this phase, a group of 6 Casinos will open up every 12 hours on the battlefield. Each Casino will provide a different type of Buff, which will be revealed when the battlefield is open. Once a Leader occupies a Casino for more than 3 hours, the Leader will take ownership of the Casino.
High Roller Casino Scramble
The High Roller Casino phase will begin after the Rookie Casino phase comes to an end.
The High Roller Casino is located at the center of the battlefield surrounded by 4 Arms Bunkers and 4 Hangout Sites. Occupying the Arms Bunkers and the Hangout Sites will help Leaders in the same City to take over the casino.
Occupying the Arms Bunkers will enable them to attack the enemies that are occupying the High Roller Casino.
Occupying the Hangout Sites will provide the City’s Leaders with additional Battle Buff(s).
Leaders must occupy the High Roller Casino for 4 hours consecutively to successfully take over the Casino.
The Leader that successfully takes over the High Roller Casino will become the “Chief Legislator”
Peace Phase
During this phase, both casino scrambles come to an end. However, players can continue to move freely on the map until the event fully ends.
TIPS
Guide on how to complete 9 raids instead of 5
Do raids in this order
Corrupt Cops Rewards
Corrupt Cop Lv. 1
| Family Gold | 10x |
| Cargo | 150.000 |
| Normal Roadster Point | 3x |
| Hitman Coin | 5x |
| Cash | 150.000 |
| VIP Points | 100 |
| Quality Gem Box | 1x |
Corrupt Cop Lv. 2
| Godfather Coins | 40x |
| Cash | 150.000 |
| Cargo | 150.000 |
Corrupt Cop Lv. 3
| Family Gold | 15x |
| Cash | 150.000 |
| Cargo | 150.000 |
| Normal Roadster Point | 5x |
| Quality Gem Box | 1x |
| Hitman Coins | 10x |
Personal Task Completion Rewards
List of items available for rewards
| Cash | 100.000 |
| Cash | 150.000 |
| Cash | 450.000 |
| Cash | 600.000 |
| Cargo | 100.000 |
| Cargo | 150.000 |
| Cargo | 450.000 |
| Cargo | 600.000 |
| Leader Exp | 15.000 |
| Godfather Coins | 120x |
| Common Gem Box | 3x |
| Quality Gem Box | 2x |
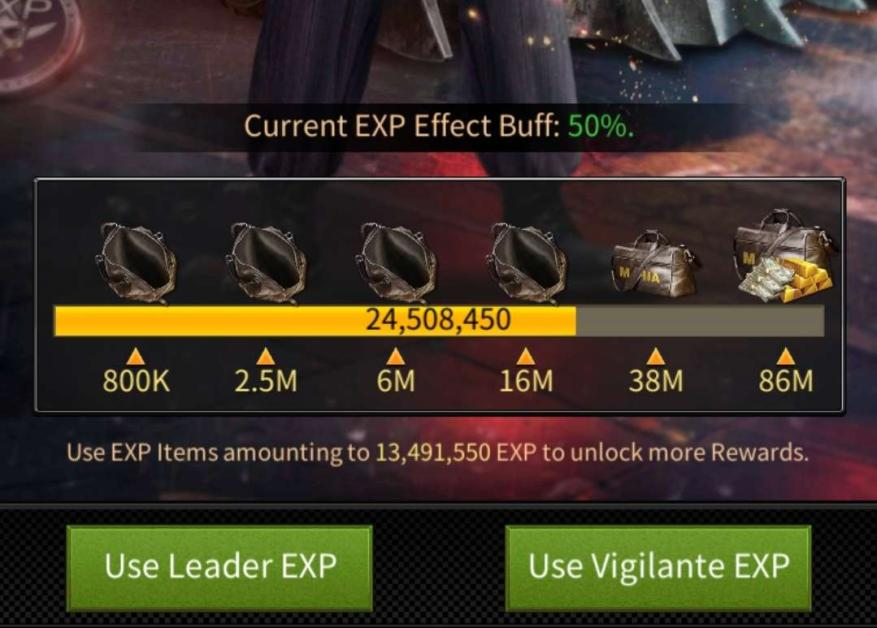
During this event, leaders can obtain special event-related points using leader or vigilante exp items.
A corresponding objective reward can be claimed when the acquired event points reach the specified amount. The available EXP benefits will take effect upon unlocking instead of collecting it first.
At the beginning of the event, Leaders will receive a 20% EXP bonus on any EXP items they use. This bonus can be further increased when your acquired event points reach the specified amount. The highest EXP bonus reachable in the event is 60%.
The actual bonus applied is based on the objective milestone you reached when you used the EXP items. Also, it does not affect the event’s point and will lose its effect when the event ends.
Players will also receive additional exp items as drop rewards from attacking the reaper mercenary during the event.
HINT: Don’t use all exp items at once. If you use them all at once you’ll get 20% boost. Use only enough items to reach individual milestones to unlock higher boosts.
Example: if you have 16M EXP and you use it all at once, you’ll end up with 19.2M EXP. If you use it in steps, you’ll end up with ~23M EXP (20% more)
© 2026 Guidelines for Mafia City