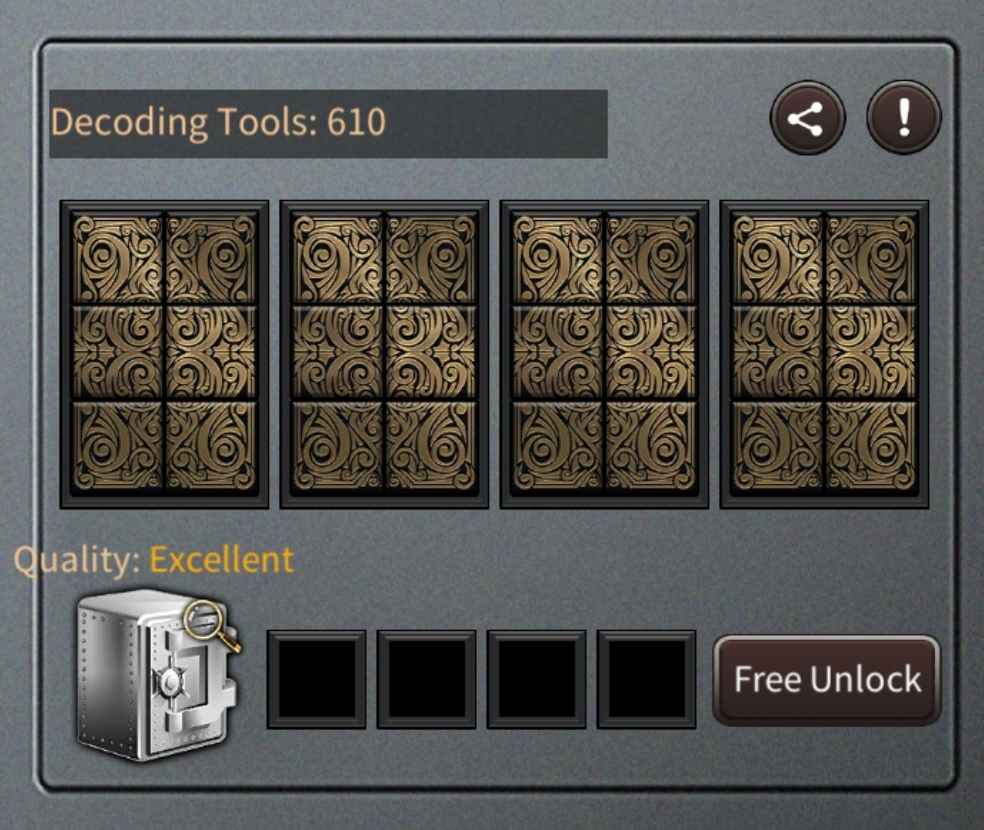
In this event, you collect decoding tools. You can get them by defeating street forces. By unlocking the safe and decoding tools, you can get classified files that can be exchanged for various vigilante fragments or resource boxes.
Tips on how to optimally decode the safe.
The fewer decoding tools you use, the better the reward.
Tools Used
Reward Quality
0-7
Excellent
8-11
High
12+
Medium
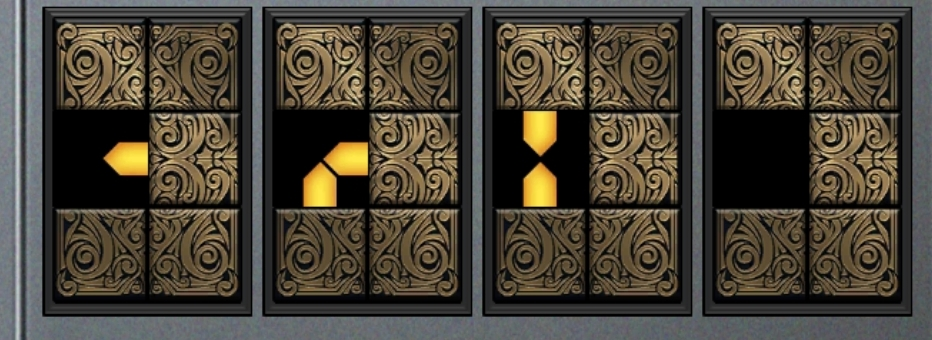
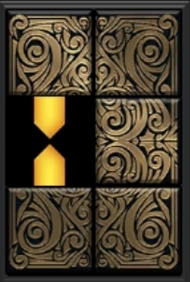
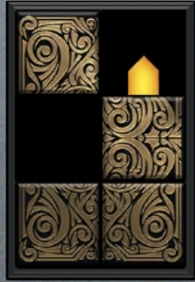
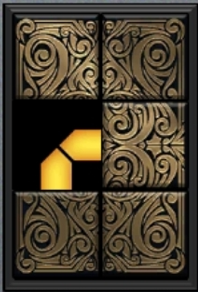
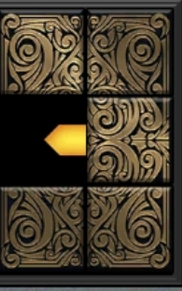
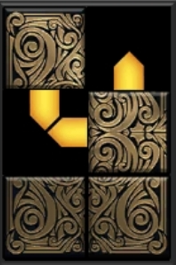
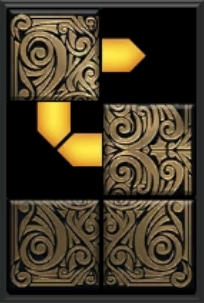
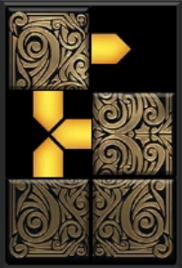
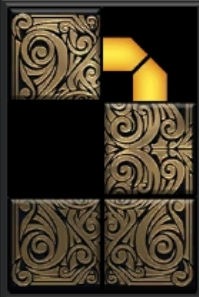
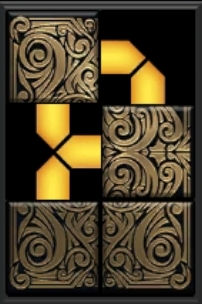
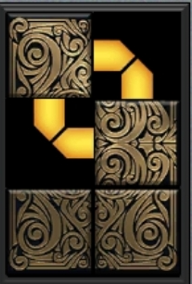
Starting point. The goal is to decode the number using as few tools as possible.
Always start with the middle left square, like this.
Some numbers can be decoded just by opening one box, some numbers require you to open the second box (top right corner).
Preparation Phase During this phase, players can begin gathering from Vegas shops, attacking Vegas forces, raiding corrupt cops, or battle leaders from other cities.
Rookie Casino Scramble During this phase, a group of 6 Casinos will open up every 12 hours on the battlefield. Each Casino will provide a different type of Buff, which will be revealed when the battlefield is open. Once a Leader occupies a Casino for more than 3 hours, the Leader will take ownership of the Casino.
High Roller Casino Scramble The High Roller Casino phase will begin after the Rookie Casino phase comes to an end.
The High Roller Casino is located at the center of the battlefield surrounded by 4 Arms Bunkers and 4 Hangout Sites. Occupying the Arms Bunkers and the Hangout Sites will help Leaders in the same City to take over the casino. Occupying the Arms Bunkers will enable them to attack the enemies that are occupying the High Roller Casino. Occupying the Hangout Sites will provide the City’s Leaders with additional Battle Buff(s).
Leaders must occupy the High Roller Casino for 4 hours consecutively to successfully take over the Casino.
The Leader that successfully takes over the High Roller Casino will become the “Chief Legislator”
Peace Phase During this phase, both casino scrambles come to an end. However, players can continue to move freely on the map until the event fully ends.
TIPS
Please be aware that Resource brawls will result in Lost Crew Members directly. Lost Crew Members can be healed at the battlefield’s Healing Center by consuming Medical Certificates.
During the event, Leaders can choose to enter and exit at any time without having any repercussions to the Leader’s progress.
In the battlefield, you can protect your Turf by using a Truce Item to avoid any attacks.
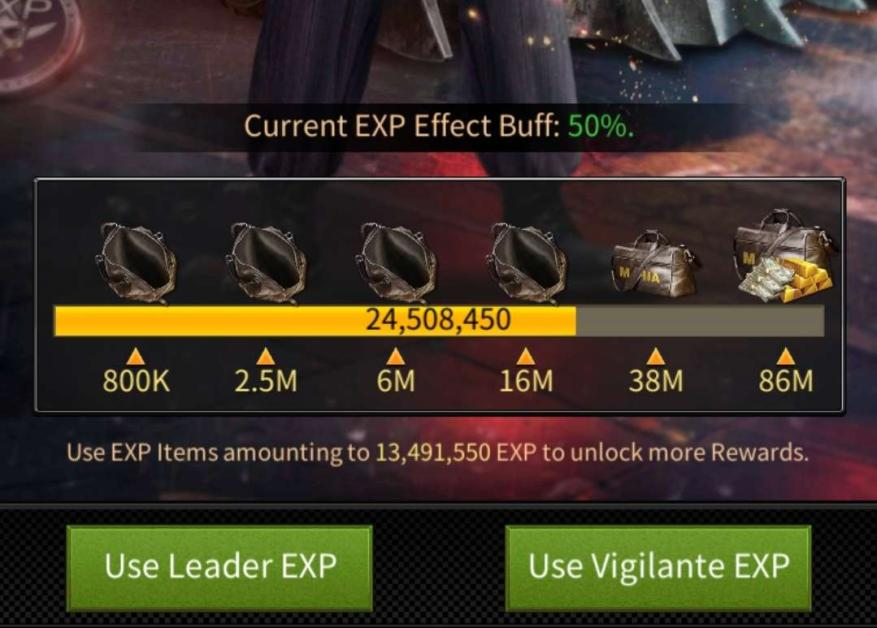
During this event, leaders can obtain special event-related points using leader or vigilante exp items.
A corresponding objective reward can be claimed when the acquired event points reach the specified amount. The available EXP benefits will take effect upon unlocking instead of collecting it first.
At the beginning of the event, Leaders will receive a 20% EXP bonus on any EXP items they use. This bonus can be further increased when your acquired event points reach the specified amount. The highest EXP bonus reachable in the event is 60%.
The actual bonus applied is based on the objective milestone you reached when you used the EXP items. Also, it does not affect the event’s point and will lose its effect when the event ends.
Players will also receive additional exp items as drop rewards from attacking the reaper mercenary during the event.
HINT: Don’t use all exp items at once. If you use them all at once you’ll get 20% boost. Use only enough items to reach individual milestones to unlock higher boosts.
Example: if you have 16M EXP and you use it all at once, you’ll end up with 19.2M EXP. If you use it in steps, you’ll end up with ~23M EXP (20% more)
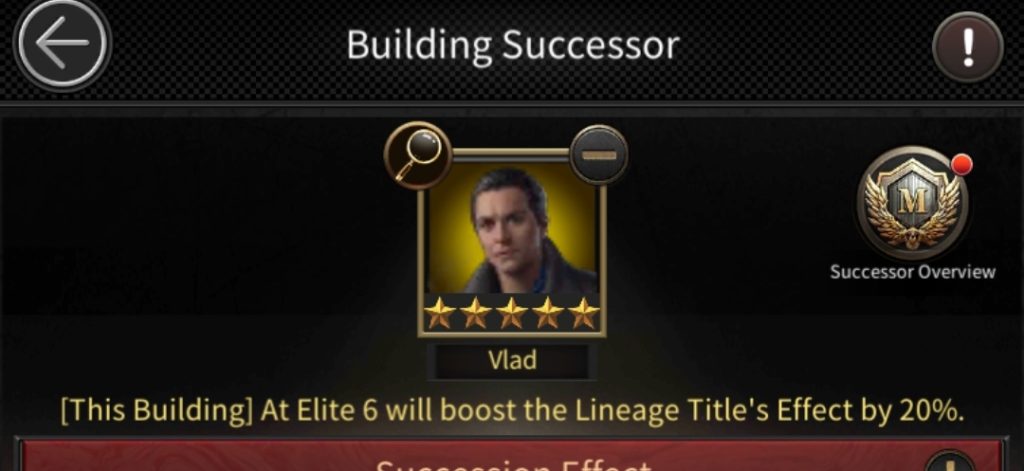
Leaders can tap “Family Club – Vigilantes” to assign Vigilantes to suitable Titles, which will allow you to access their full potential, bringing the maximum number of buffs.
Succession hierarchy is available only to vigilantes that have unlocked their 5th star. It can further expand the benefits attained from the Title Succession feature.
You have to assign vigilantes to some Lv. 30 or above buildings to attain corresponding titles and relevant benefits.
Vigilante official titles attributes are permanent and do not require a vigilante to lead an op. Attribute buffs are related to a given Vigilante’s star-up and level. Leaders can choose to appoint vigilantes to tons of different titles.
To unlock the title, you need vigilante fragments and elite or simple lineage cards. You can get lineage cards by buying packs or from a clan store (limit: elite cards 20/week, simple cards 10/day). Simple lineage cards are required for purple vigilantes, and Elite lineage cards are required for gold vigilantes.
You can assign vigilantes to individual buildings by clicking on a building and selecting icon Succession Management. The more stars vigilante has, better the boost/buff.
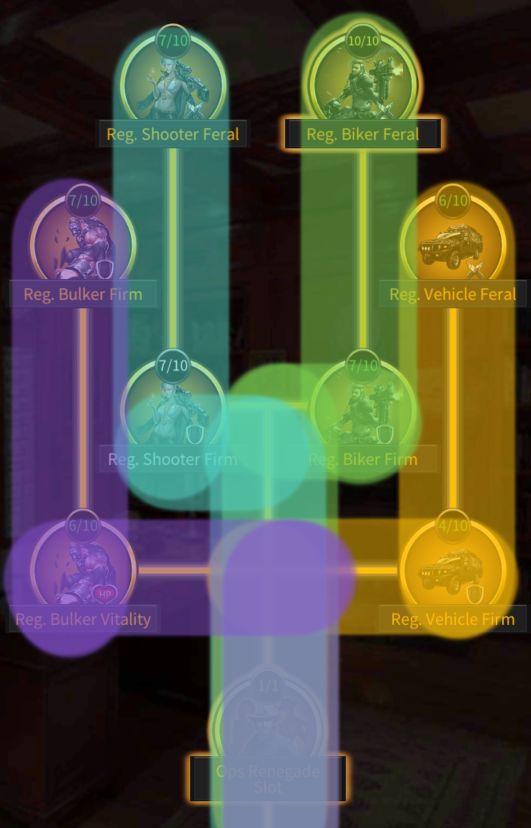
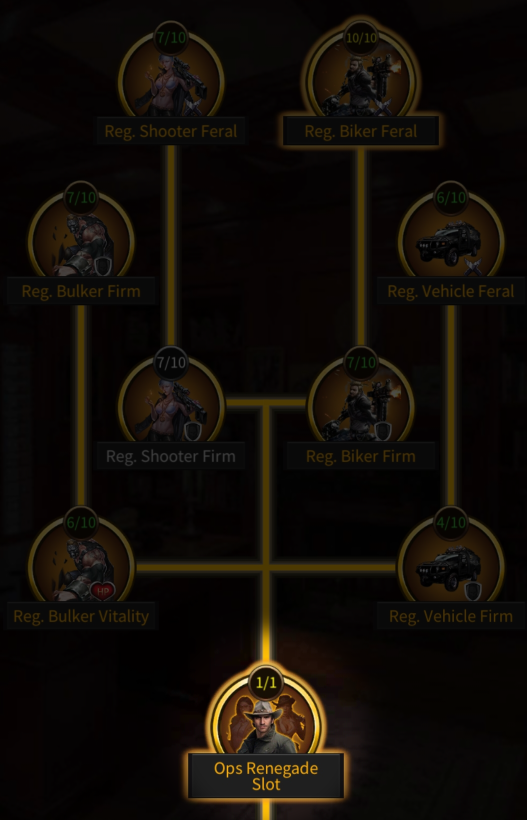
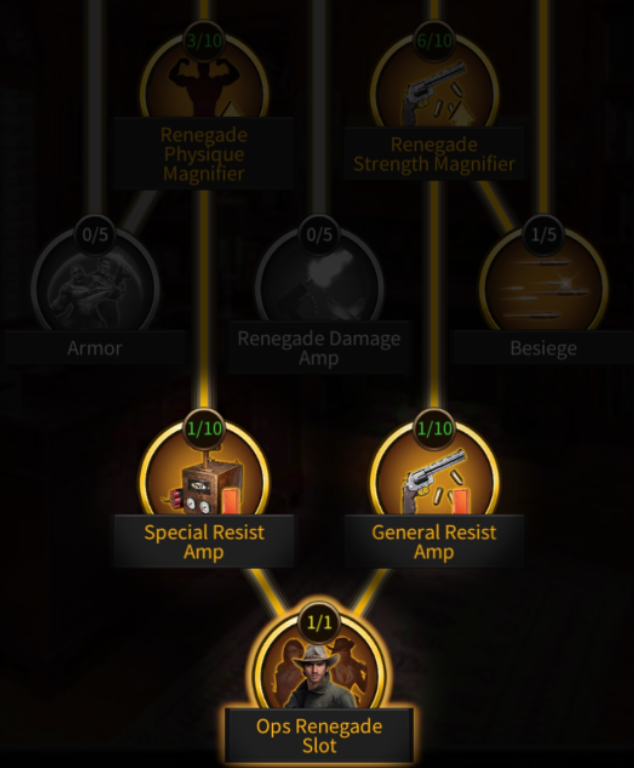
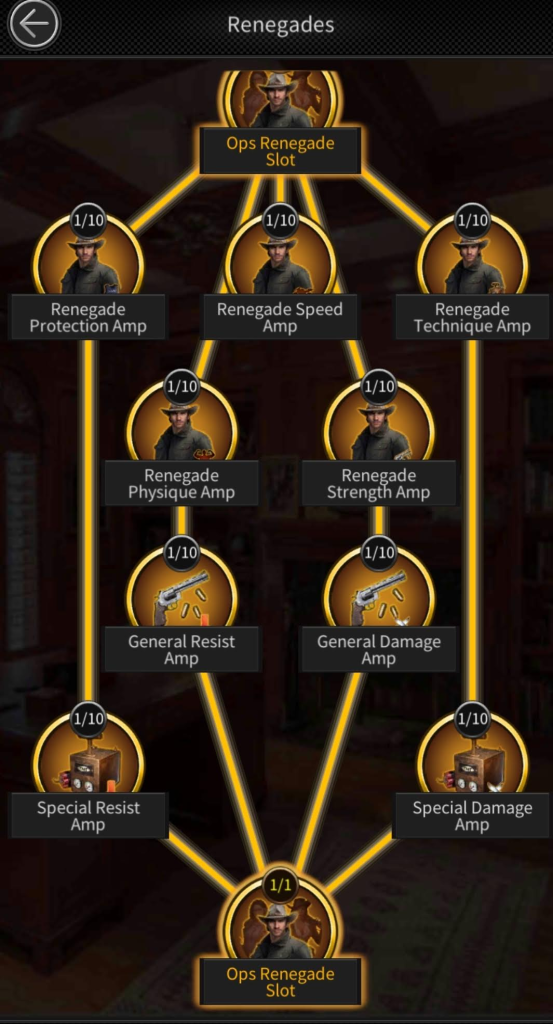
Note: how many renegades you can use depends on what season you’re in. If you unlocked all three slots and migrated back to the city still in season 2, you won’t be able to use 3rd slot (only 1st and 2nd slots).
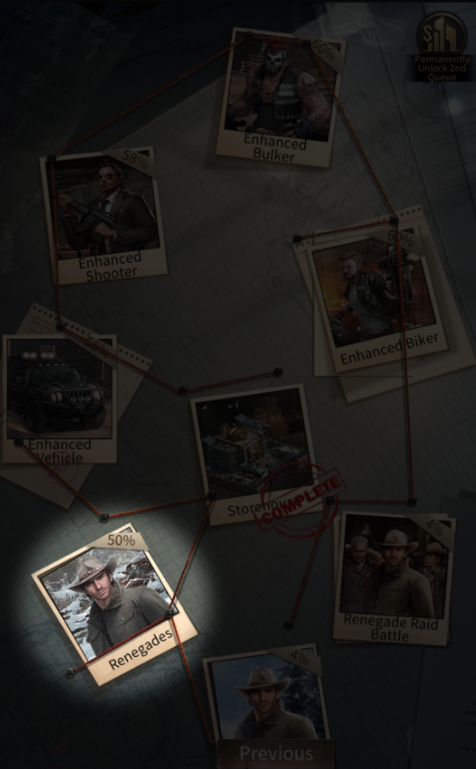
How to unlock renegades?
Renegade slots can be unlocked in Investment Agency under the category Renegades.
How to unlock 1st renegade slot?
Choose one of the paths (purple, blue, green, or yellow) and level it up to level 5.
How to unlock 2nd renegade slot?
When Season II starts you get two new investments available (Special Resist Amp and General Resist Ampt). Level them up to at least level 1.
How to unlock 3rd renegade slot?
All investments below Ops Renegade Slot must be at least level 1, like it’s shown on a screenshot below.
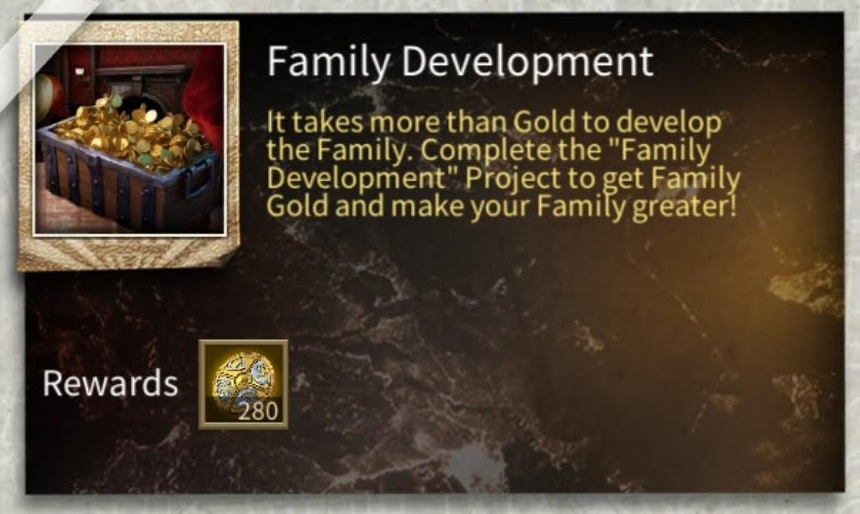
* assumed you get and spend 500 SVIP points daily ** assumed you get 3 family development tasks per 5 days (~170 gold per task on average) *** tested on hard difficulty up to 30th floor *** Slammer privilege gives 7.000 family gold per week, if you reach 40th floor (costs 5.5$ per week)
SVIP store allows you to buy certain items and activate SVIP privileges. As you buy items and activate privileges you gain store experience which leads to leveling up the store and unlocking more items and privileges.
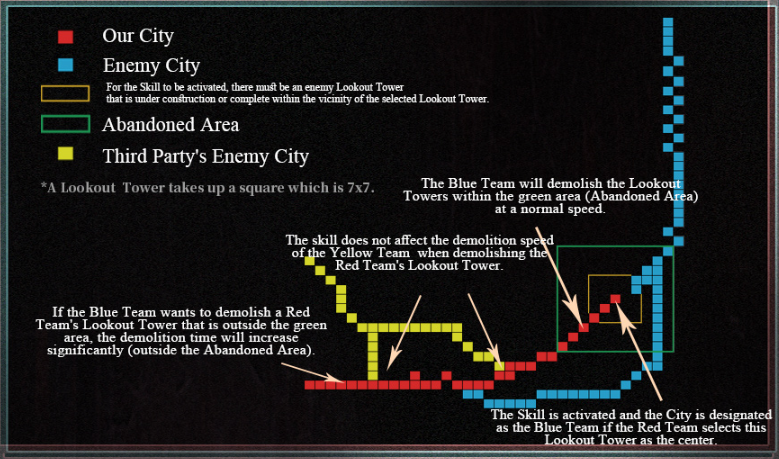
This skill is for strategically abandoning an area of allied and enemy lookout towers to protect your city’s towers by increasing the needed demolishing time.
Skill effect:
Select an allied lookout tower (including ones in repair) in the combat area as its center. There should be lookout towers (excluding the inactive ones) from other enemy cities within the surrounding 15×15 area.
Select an allied lookout tower in the combat area as its center. The surrounding 77×77 area will be considered an abandoned area, and all lookout towers outside of this area will be protected. This will cause the demolition time for these lookout towers to increase significantly for the assigned city.
The effect only applies to the assigned city.
The protection effect only applies to active lookout towers, excluding those inactive or in construction.
Allied lookout towers selected as the skill’s center that are demolished during the skill’s effect won’t affect the skill.
Lookout towers under the protection effect, are immune from demolishing skills like demolition expert and forced demolition.
We use cookies to ensure that we give you the best experience on our website. If you continue to use this site we will assume that you are happy with it.